
How to Setup Dynamic Number Insertion
1. In this tutorial you will learn how to setup dynamic number insertion on your website. Dynamic Number Insertion also known as DNI allows you to swap out the existing hard coded number on your website with a dynamically inserted number that is allocated to a specific website traffic referring source. These sources of traffic typically comprise of Paid Search, Organic Search, Paid social media, Organic social media, Email marketing links and Direct clicks to your website’s URL. In this example we will show you how to setup DNI for direct load as in when someone enters your website’s URL directly into their web browser.
2. Here is an example of a website which will be used to demonstrate DNI. In the header of the website, you will see a call to action with a telephone number comprising of the digits 888- 592-2921. The phone digits 888-592-2921 are hard coded in the website and will be used as a target for swapping out the same with a dynamically inserted tracking number.

3. To get started with the process of DNI, login to your call tracking account and navigate to the left menu and click “Numbers.”

4. Navigate to the tracking that you wish to deploy for DNI and click on the blue gear icon to open the number settings.

5. When the number settings menu is displayed, click the “Assignment” tab.

6. Under the number assignment screen click the Channel selection arrow. In our example in this tutorial we will be assigned the Direct channel to tracking number 804-368-6730.

7. In this example we will demonstrate how to assign DNI for Direct traffic. Select “Direct” from the drop-down menu.

8. After completing the channel selection by selecting Direct, navigate to the field that is labeled Site Number Group.

9. Click the “Add/Modify” button to setup a new Site Number Group.

10. In the pop-up menu that opens on your screen navigate to the “Group Name” field that appears under Manage Site Groups.

11. Enter a name for your group name. After entering a name for your group, click “Next”

12. After naming your site number group navigate to the “Site Number” field and enter the ten digits of the default number that you have targeted for swapping out with your DNI enabled tracking numbers. In this example, we will enter the digits of our example website which are 888-592-2921.

13. After we have entered the ten digits, we will click the “Save” button to save the site number with the group name.

14. We will click “OK” to confirm our settings.

15. Next, we will click the X icon on the upper right hand corner of the pop up menu to close the pop up guide.

16. After the popup has closed, you will navigate to the Site Number Group field and click the field to render the group that you setup in the earlier steps.

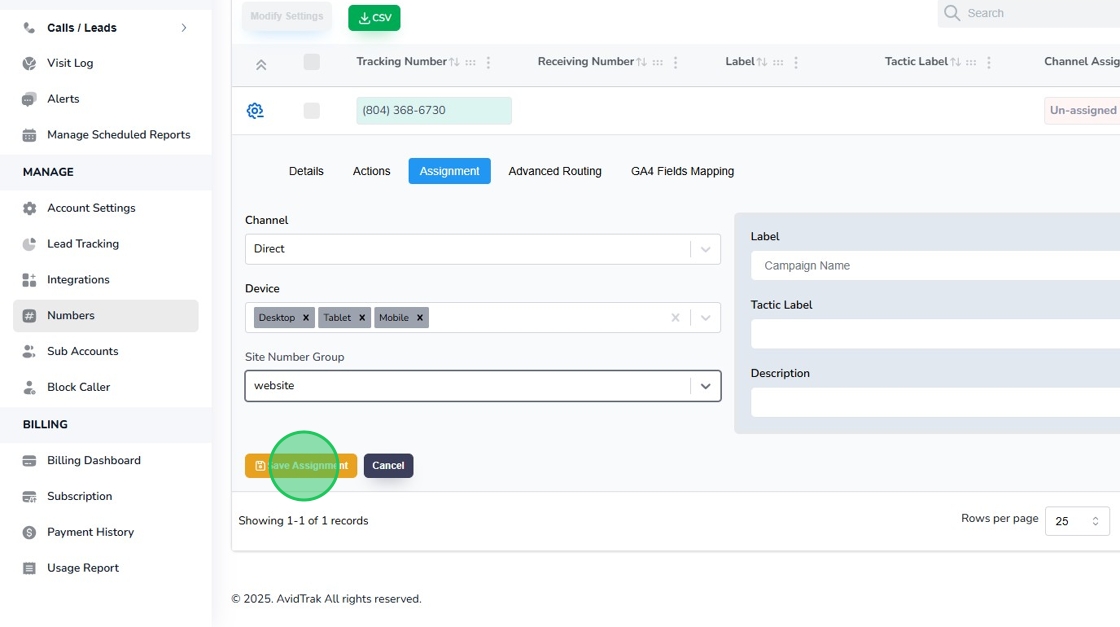
17. Click the group named “website” which was setup in the earlier steps.

18. Next, click the “Save Assignment” button to save your setting.
19. Click the “OK” button to reconfirm your settings.

20. Click “OK” again to move to the next step.

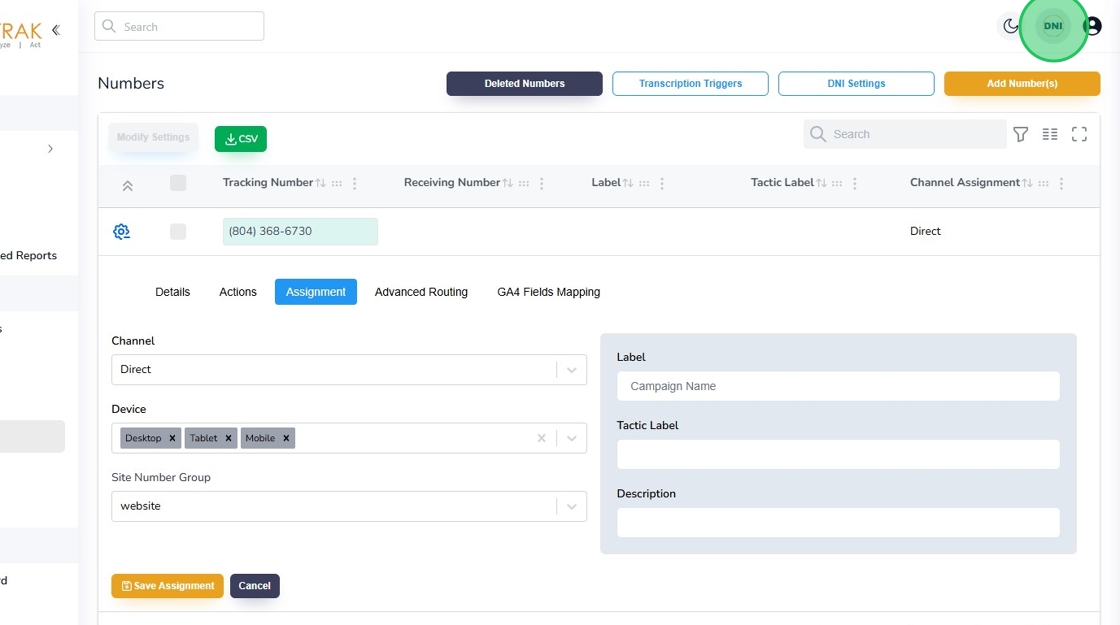
21. After completing the target swap number setup, you will now be guided on how to setup your account’s JavaScript on your website’s web pages. To proceed with JavaScript setup, navigate to the upper right corner of your screen and locate the DNI button. Click the DNI icon to render the menu options.
22. Under the Dynamic Number Insertion menu click the option that is labeled “Get Tracking Code.”

23. Click the “Copy Code” button and transfer it to a note pad.

24. To learn how and where to apply the tracking code click “How to add tracking code to your website.” If you already know how to apply JavaScript code on your web pages you may skip this step.

25. After you have reviewed the recommended technique of adding JavaScript to your website click the “Close” button.

26. Now go ahead and add the copied JavaScript to your website exactly as prescribed in the previous section. After you have added the JavaScript to your website, you are now ready to test. To test, open a web browser in either Private (for Safari and Firefox) and Incognito (for Chrome) and type in your website URL. If you have followed the steps exactly as outlined in this tutorial you should see your website’s default phone number be swapped out with the assigned tracking number as shown in our example here.

27. This concludes the tutorial on how to setup dynamic number insertion. If you have questions or need any kind of assistance setting DNI tracking for your website, please contact support@avidtrak.com. Thank you.