
Facebook/Instagram: + AvidTrak Call Tracking Integration
1. In this tutorial you will learn how to report inbound phone call conversions within your Facebook advertising campaigns.
Requirements
We require two mandatory parameters to be appended to the landing page URL of your Facebook Ads. These parameters are required to push offline phone call conversions into your Facebook account.
- fbclid – The Facebook Click ID parameter is by default sent by Facebook in every visitor’s URL.
- fb_pid – The Facebook Pixel ID parameter must be configured manually for each ad campaign for which you need to report an inbound phone call conversion. The value used in the FB PID parameter will be the Pixel ID that is related to the dataset under the Facebook business portfolio.
The steps outlined below will help you obtain the pixel id from your Facebook Business account. We are assuming that you already have a ‘Business Portfolio’ under ‘Facebook for Business.’
2. Select your desired business portfolio. In the event you do not have a business portfolio already setup, then please create a new one that is aligned to your business details.

3. Click the “Settings” link as shown here.

4. Next, expand the “Data Source” node.

5. With the Data Source node expanded, find and click, “Datasets.”

6. Click the “Add” button to create a Dataset.
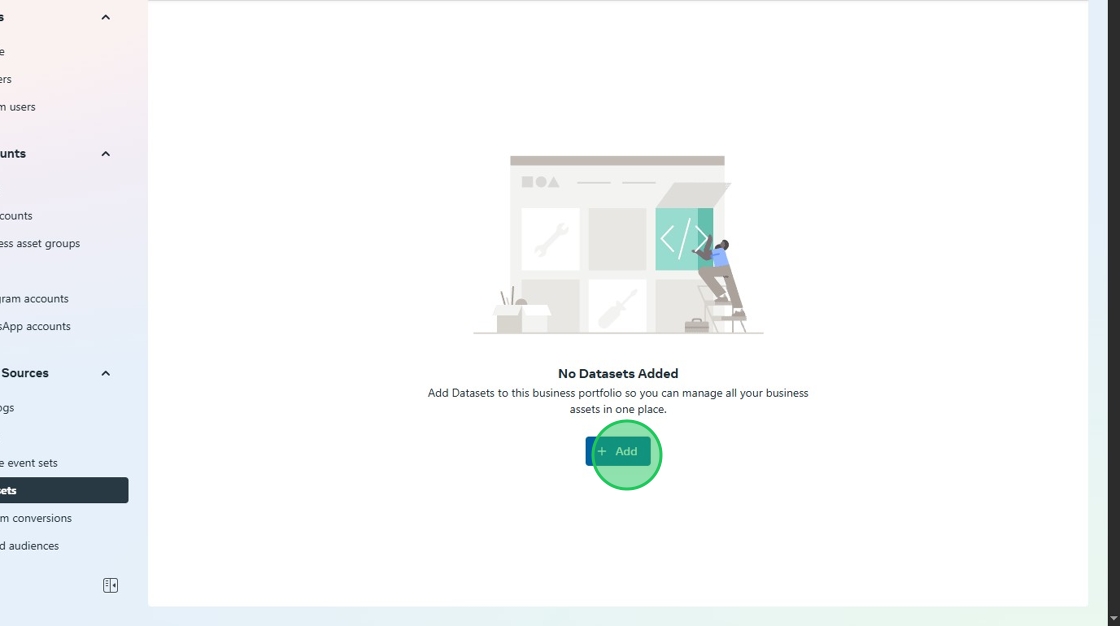
7. Click the “Create new dataset” link.

8. Enter a suitable name for the dataset. In this example as it pertains to reporting inbound phone calls from the AvidTrak call tracking platform, we recommend that you enter the value “AvidTrak Calls” in the Name field. After entering the name in the field, apply a checkmark in the box labeled “Request a Free Conversion API Gateway demo..”

9. Click the “Create” button to create the dataset.

10. Once your dataset is successfully created by Facebook, you will be issued a unique ID for the dataset, which you will need to copy and save for use later. The ID of your newly created dataset is your “Pixel ID”.

11. After storing your pixel ID in a safe location, navigate to “Apps” under the Accounts menu, and then click the “Add” button.

12. Find and Click the “Create a new app ID” link.

13. Enter the App name and your contact email (in case Facebook needs to connect with you). The app name may be any name that you choose. You could use an app name such as AvidTrakMyCompany. After entering the App Name and your Email address, click the Next button.

14. After Facebook takes you to the next page, find and Select “Other” from the menu options and then click “Next.”

15. After completing step number 14, Select “Business” from the menu rendered under ‘Select an app type’, and click “Next.”

16. Review and confirm the details on the screen (and make changes if necessary) then click the “Create app” button.

17. After creating step 16, navigate to the “System users” from the Users menu.

18. Click the “Conversion API system user” link then click the menu icon (…). If you are unable to see the “Conversion API System User” then refresh the screen, as the Facebook system sometimes takes time to render the User to appear on the page for the first time.

19. After successfully completing step 18, click the “Assign assets” button.

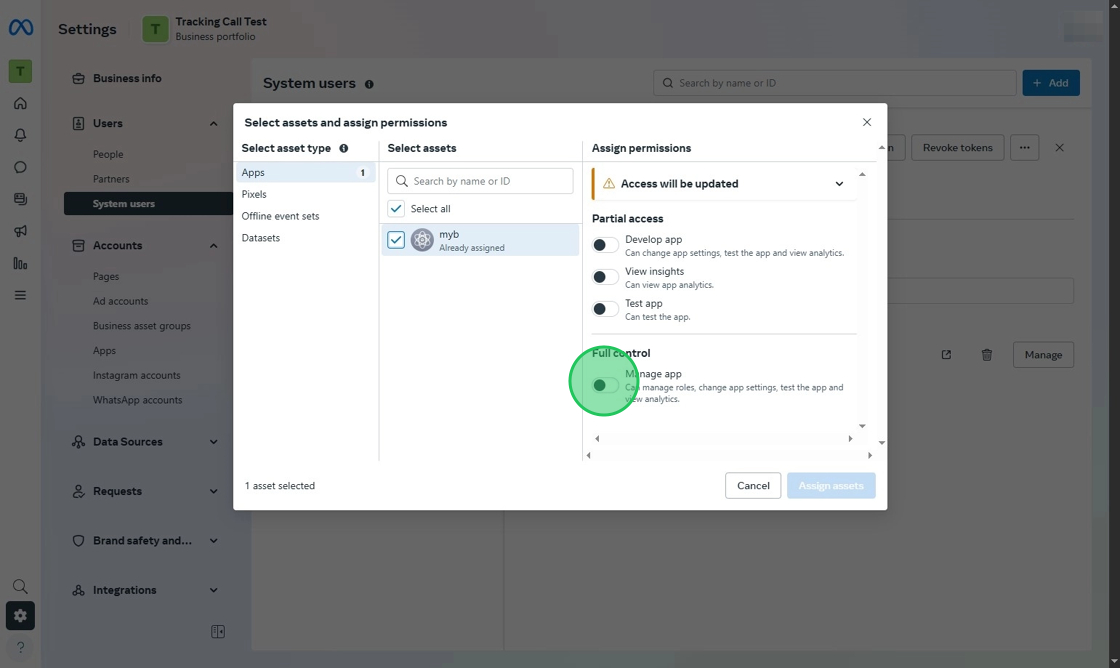
20. Find and Click the “Apps” option under Select asset type, and then select the app that you had created earlier.

21. After completing step 20, enable the “Manage app” option
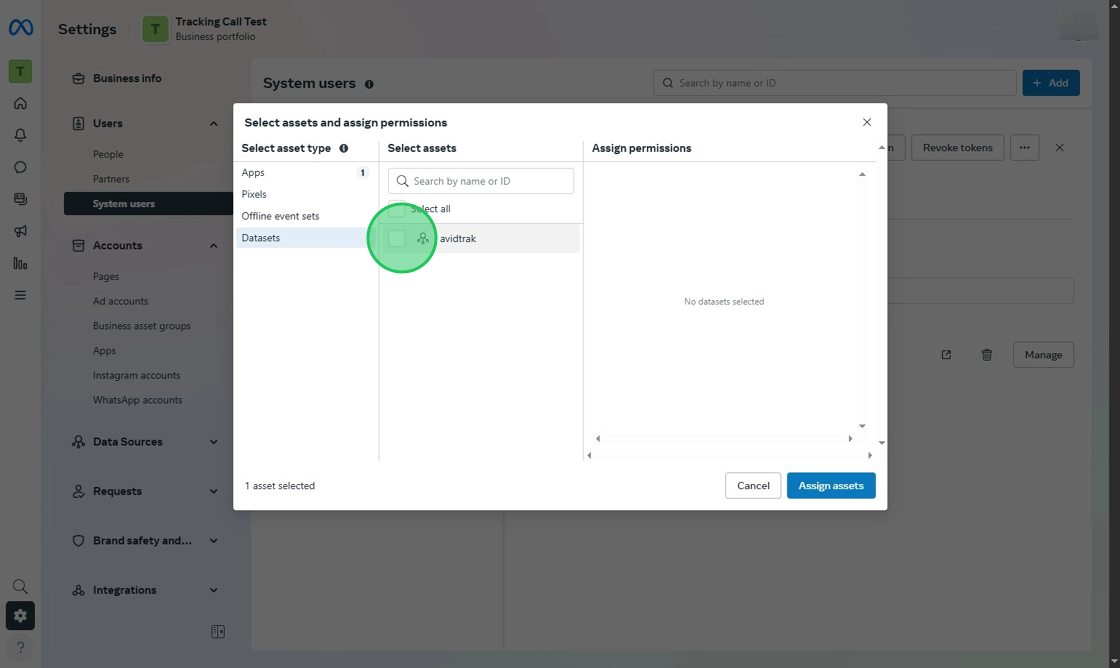
22. Next, click “Datasets” then select the dataset created earlier.
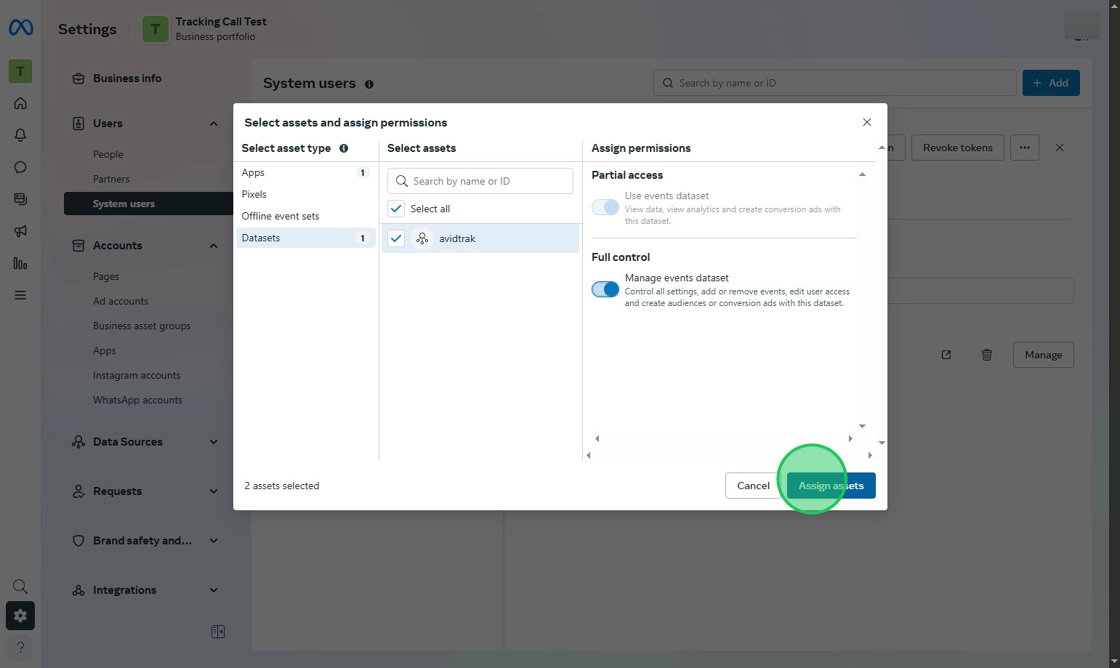
23. After completing Step 22, Find and enable the “Manage events dataset” option.

24. Click the “Assign assets” button.
25. Click the “Done” button.

26. Click the “Generate token” button after selecting System Users under the Users menu.

27. Select the app that you created earlier.

28. After selecting your app, Click “Next”

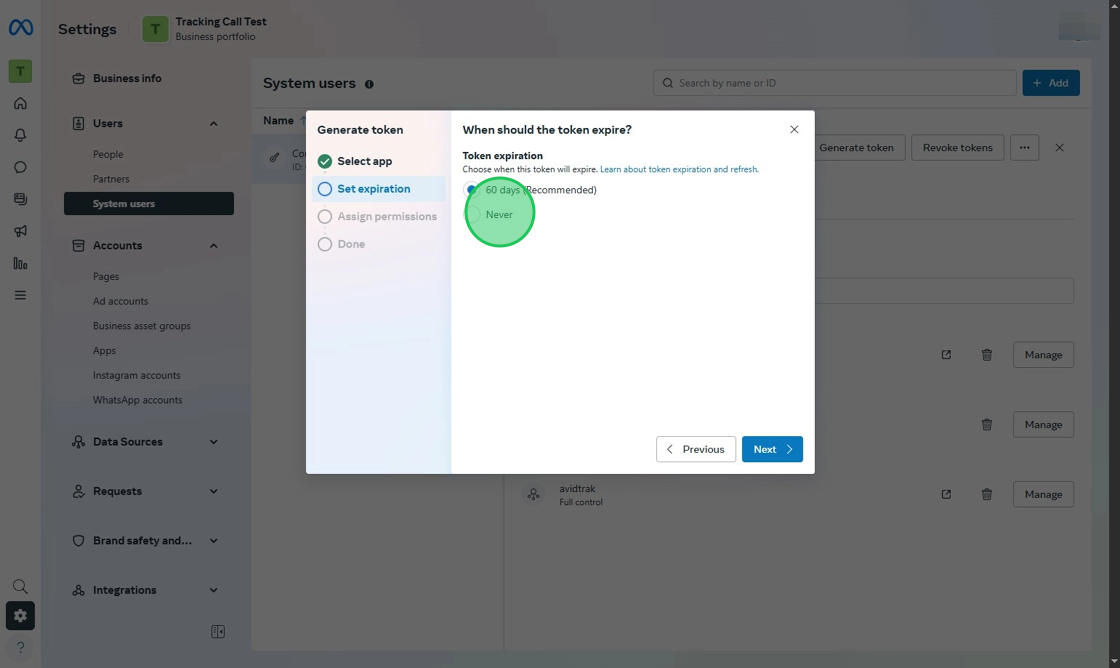
29. Under the Set expiration option select “Never” and click Next
30. In the assign permission step, select the options “ads_management” and “business_management”

31. After completing step 30, Click “Generate token.”

32. Copy and store the token in a safe place now, because this token is visible only once and will not be visible to you after Step 32 is completed. Please share the value of this token with AvidTrak so that your inbound phone call conversions may be reported into your Facebook Ads account.

33. Click “Done” after you have copied and saved the token in a safe place.

34. Add the New Parameter in your Facebook Landing page URLs
After you have completed Step 33 and shared you token ID with AvidTrak, you will now need to implement the parameter tags that allow Facebook to share the pixel value in your paid ads’ visitors’ URL.
We recommend that you use and follow Facebook guides to add the necessary parameters to your ads’ URL. Click the link below to learn from Facebook.
https://www.facebook.com/business/help/1016122818401732
Summary:
You will need to add the “fb_pid” parameter to your Facebook Ads’ landing page URL and for Instagram, you will need to add the “ig_pid” parameter ID value to the Instagram landing page URL. The pixel id value was obtained above in step 10.
Parameter name will be “fb_pid” and value will be the pixel id obtained in step 10.
35. This completes the tutorial on how to set up and report inbound phone call conversions for your Facebook and Instagram paid ad campaigns. If you face any difficulty in implementing these instructions or have questions related to this feature, please do not hesitate to email support@avidtrak.com