
1. In this tutorial you will learn how to connect your Claude AI account with your AvidTrak account such that you can make Claude your dedicated data analyst. Once you have connected Claude to your AvidTrak account, Claude will have access to almost all your call tracking account’s data. The data will comprise of call detail records, visit detail records, transcription and call outcomes and AvidTrak billing records. If your AvidTrak data is confidential and/or if you are sharing your Claude account with others, we do not recommend that you connect your Claude account with your AvidTrak account.
The cost of running Claude and token usage for conducting AI data analysis will be incurred in your Claude account. You will need to have Master Administrator access to your AvidTrak account and your Claude account to connect both the platforms.

2. Login to your Claude account as the Administrator of the account.
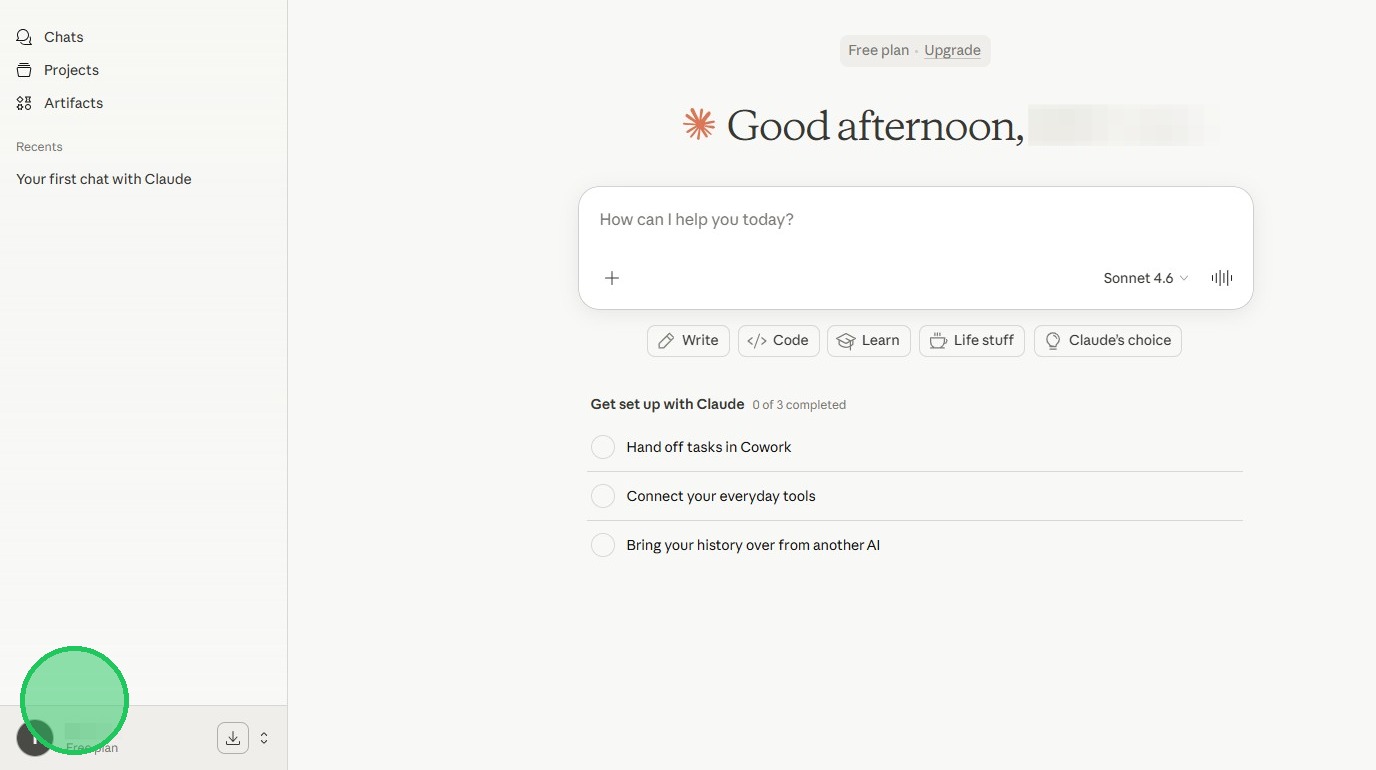
3. Next, click on the icon located at the bottom left.
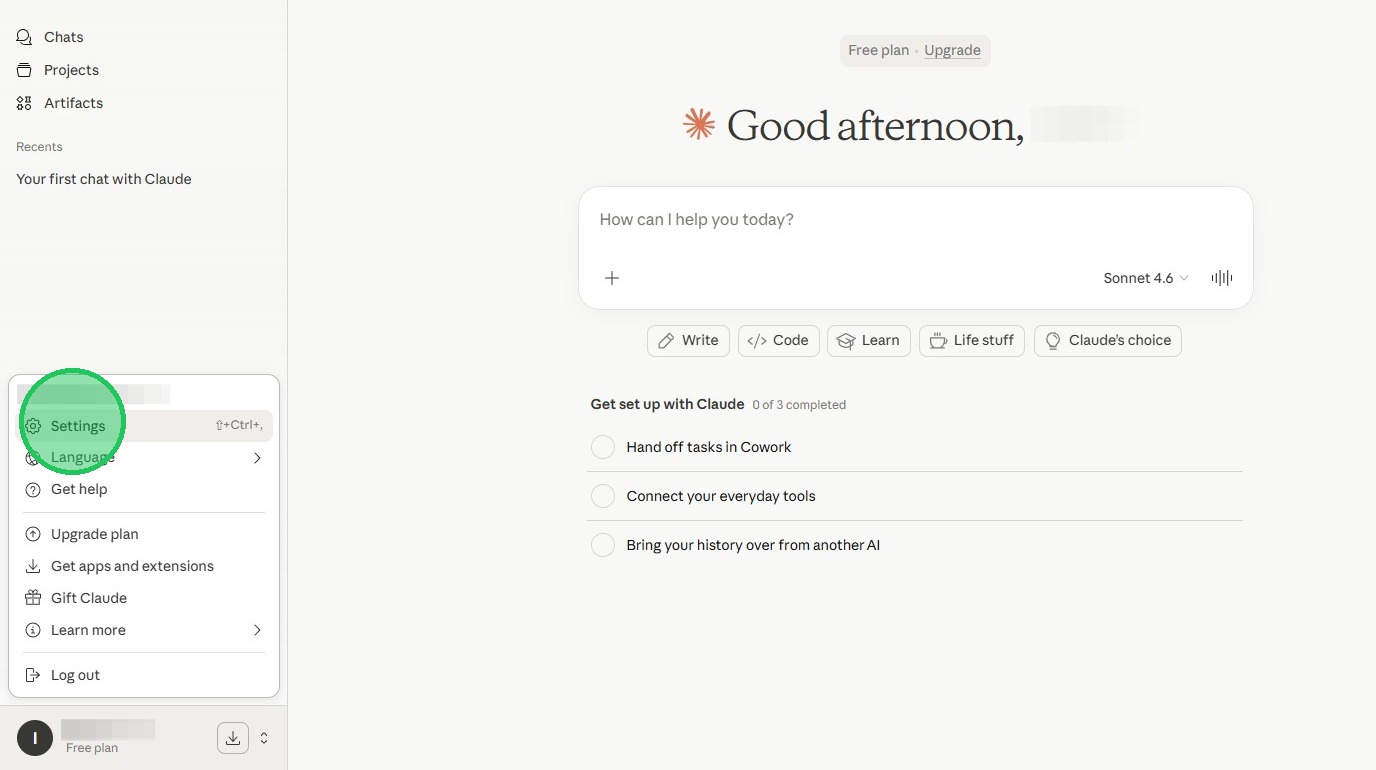
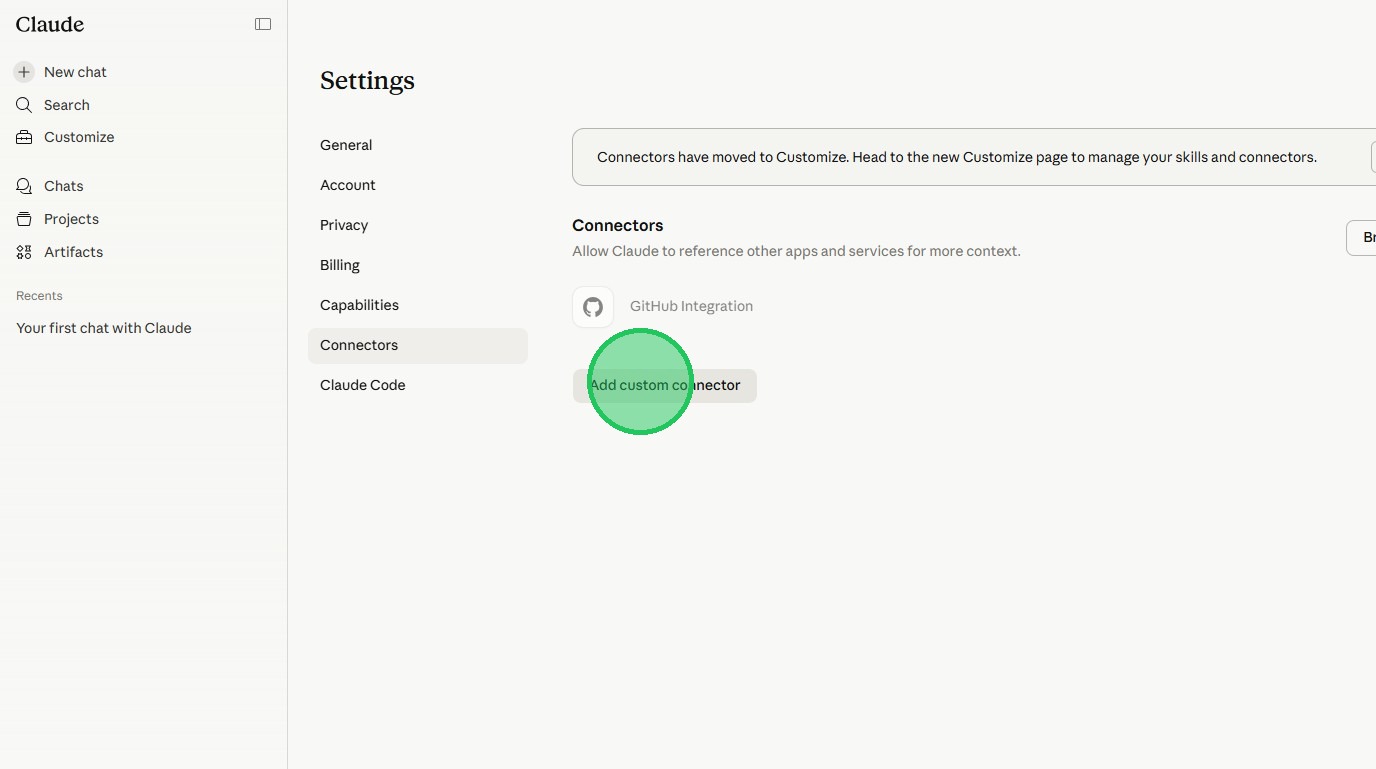
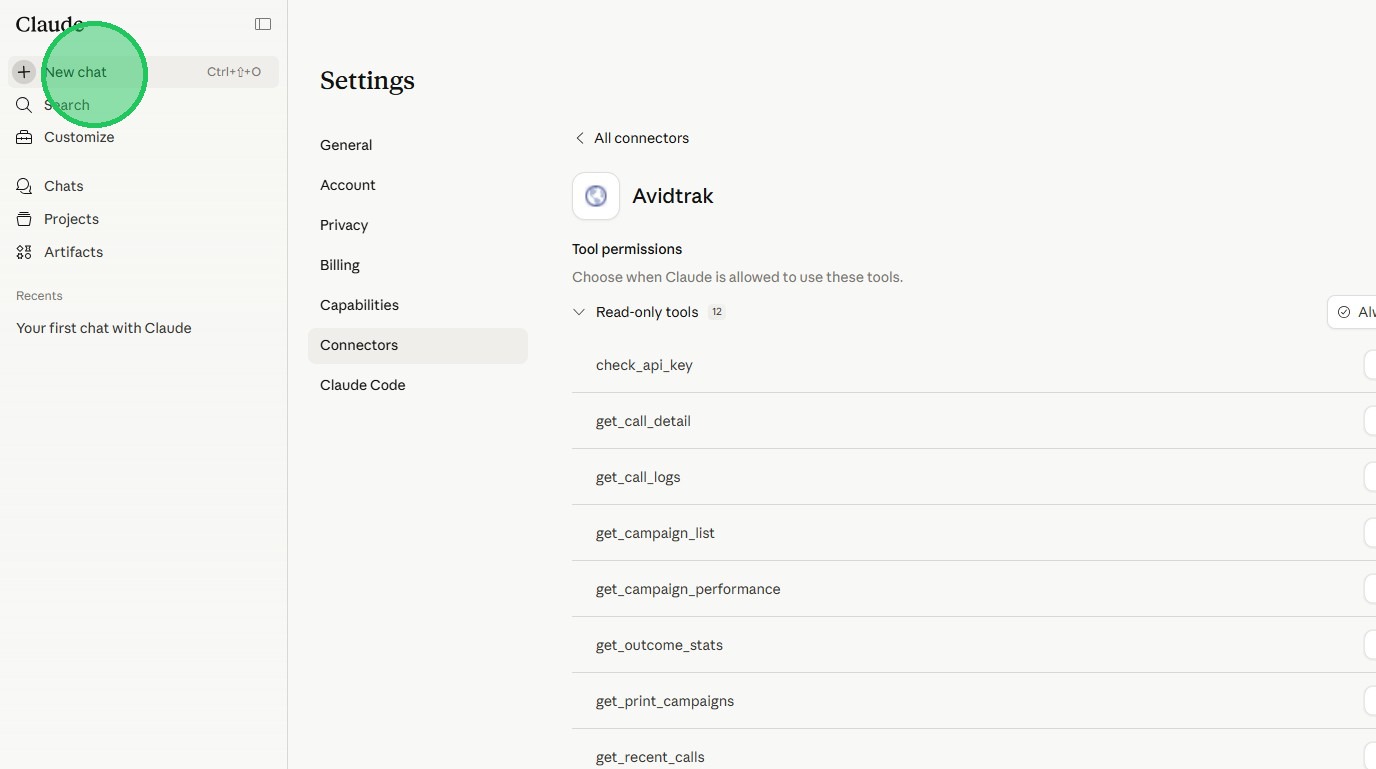
4. Next, Click the “Settings” link
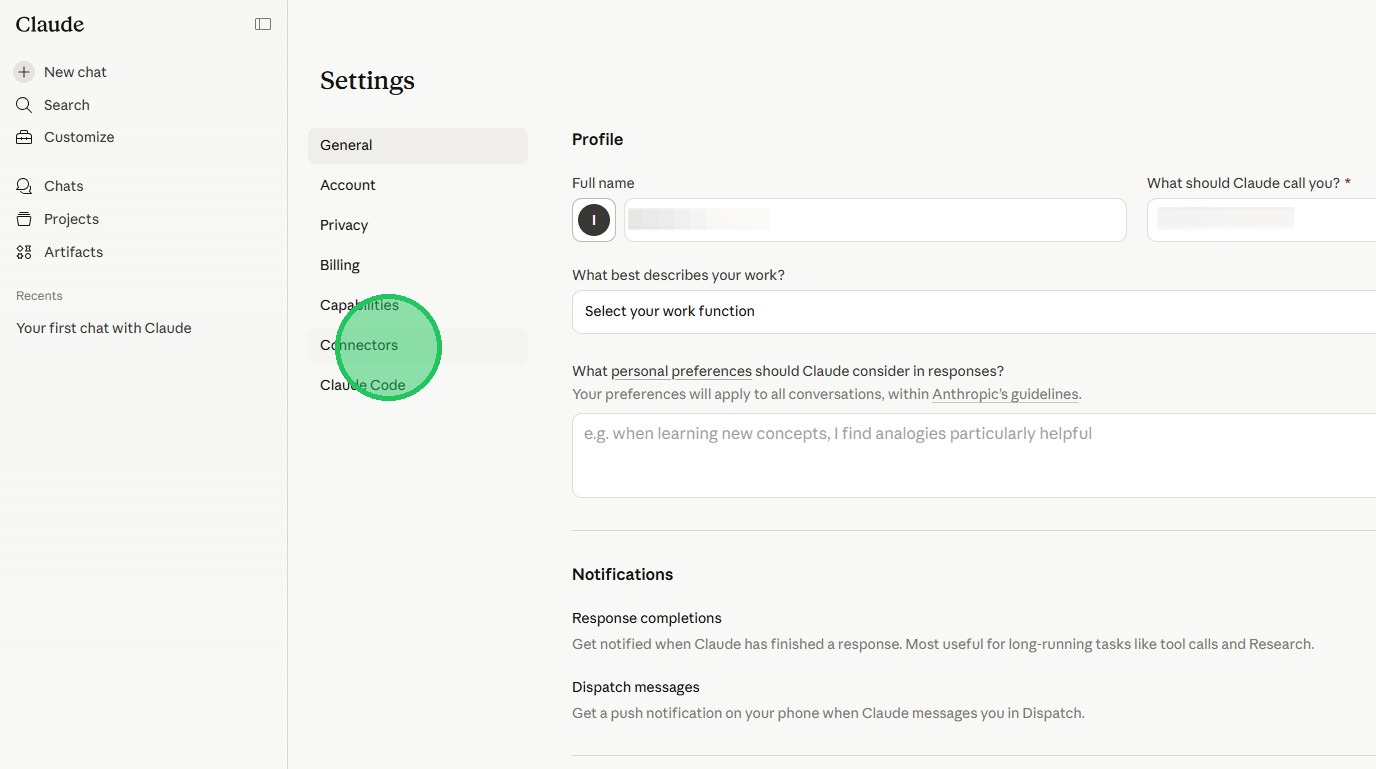
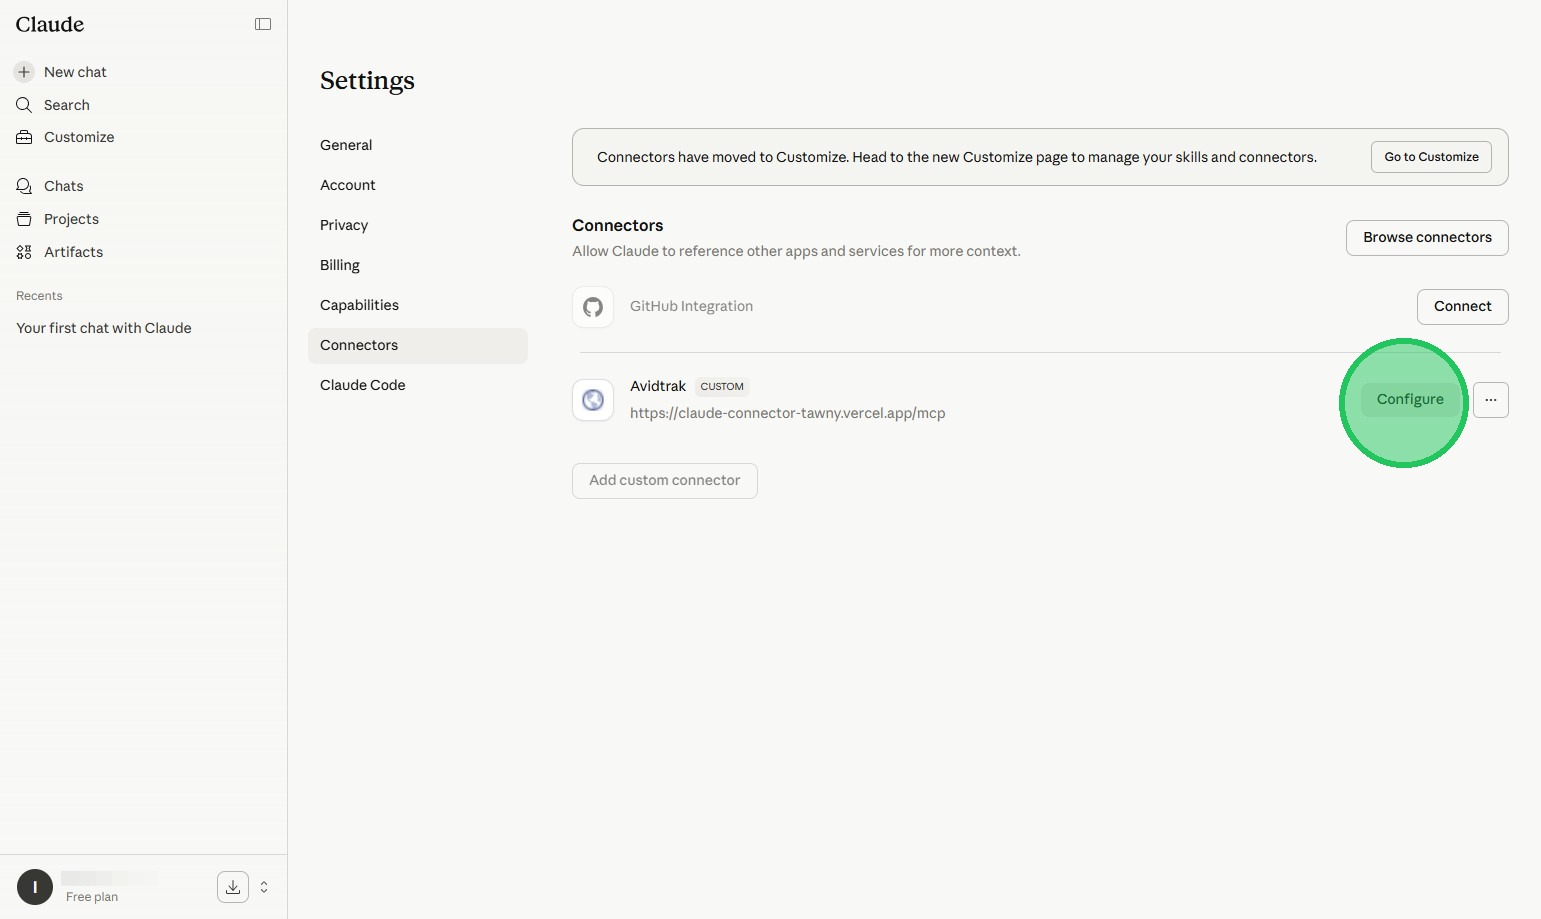
5. Next, Click the “Connectors” link
6. Next, Click the “Add custom connector” button
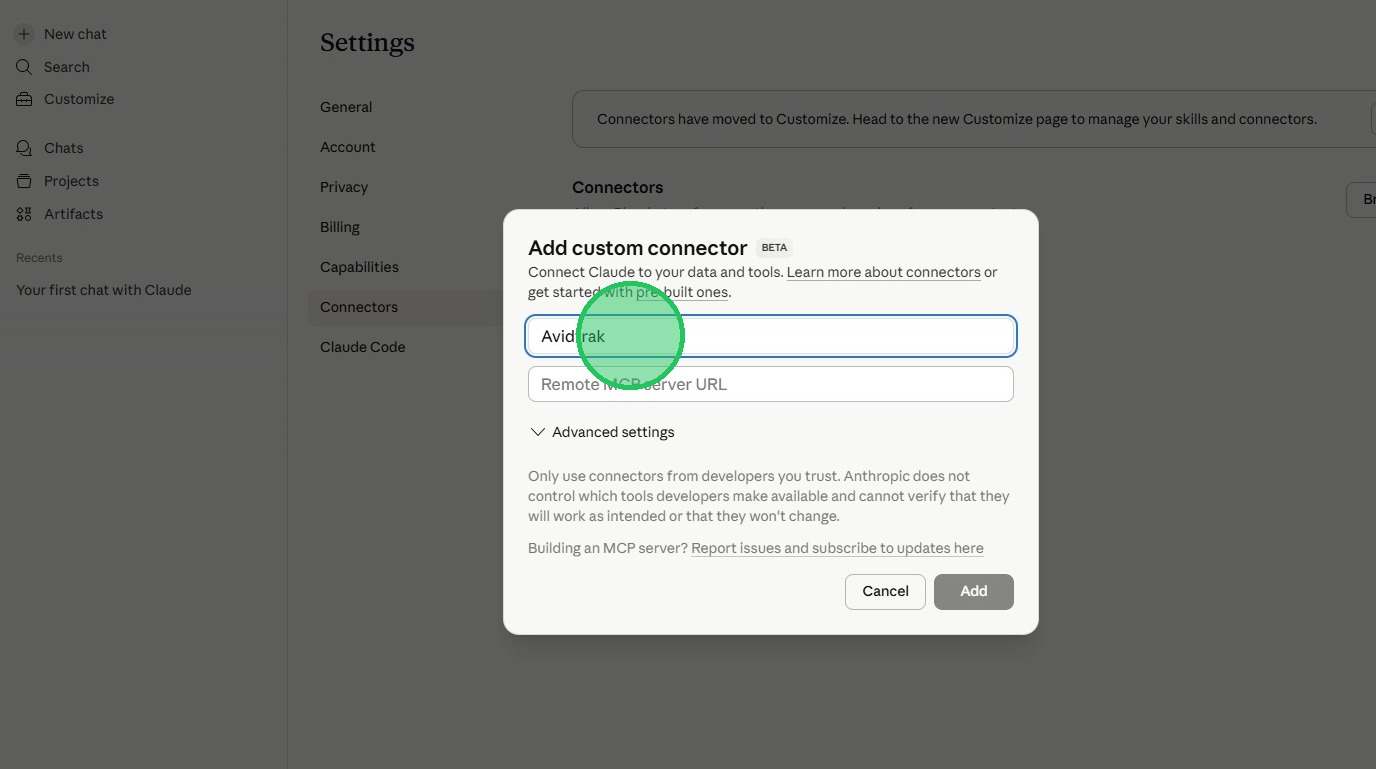
7. Next, Click the “Name” field and type in AvidTrak.
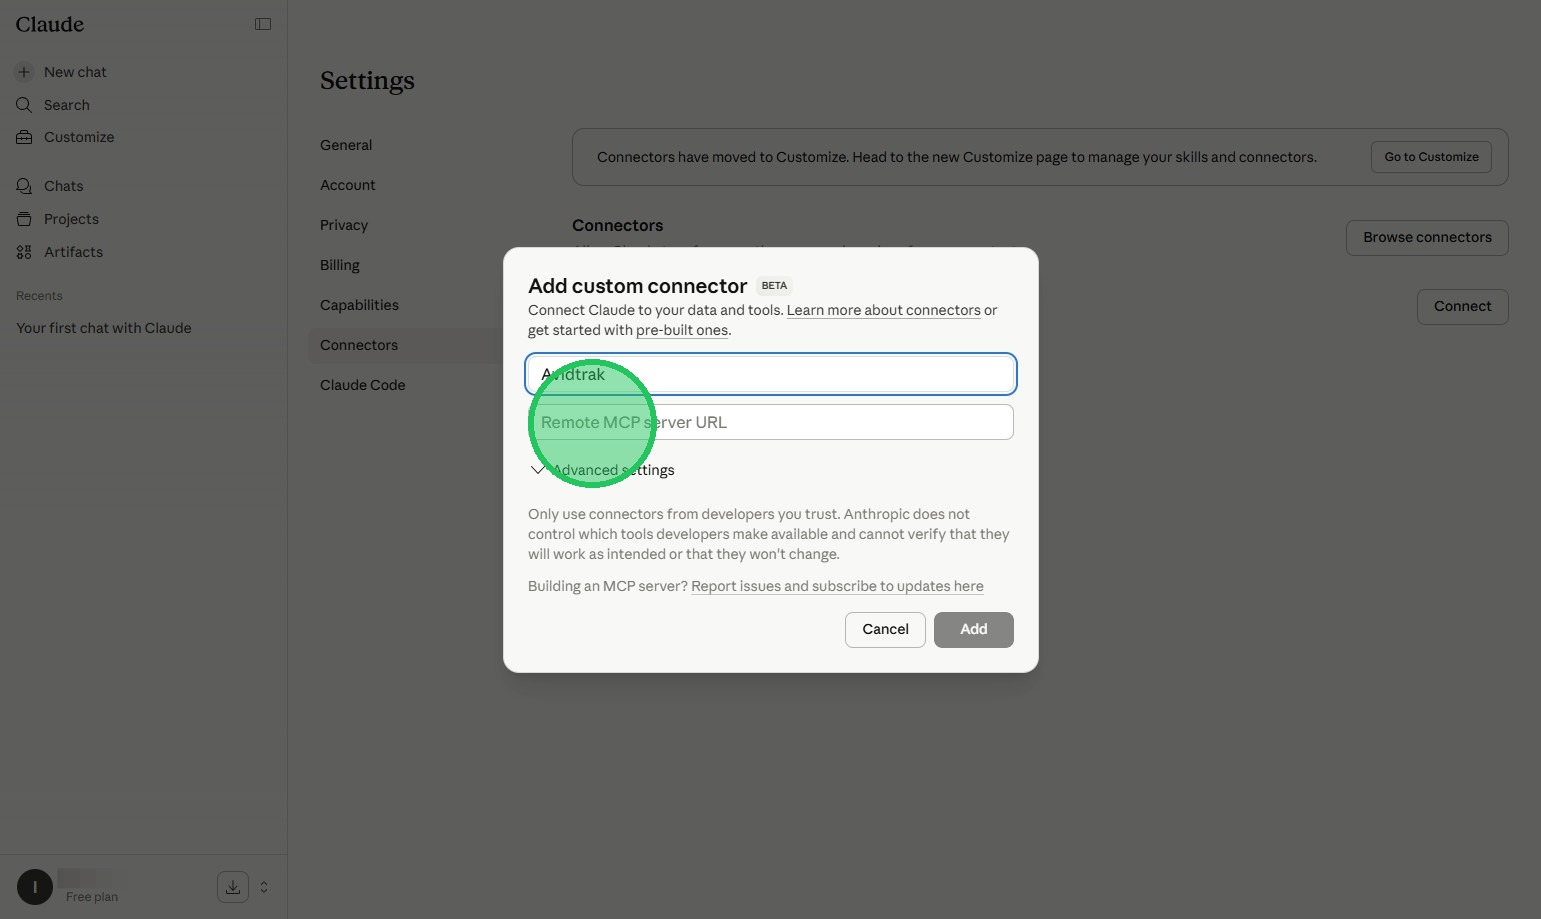
8. Next, Click the “Remote MCP server URL” field.
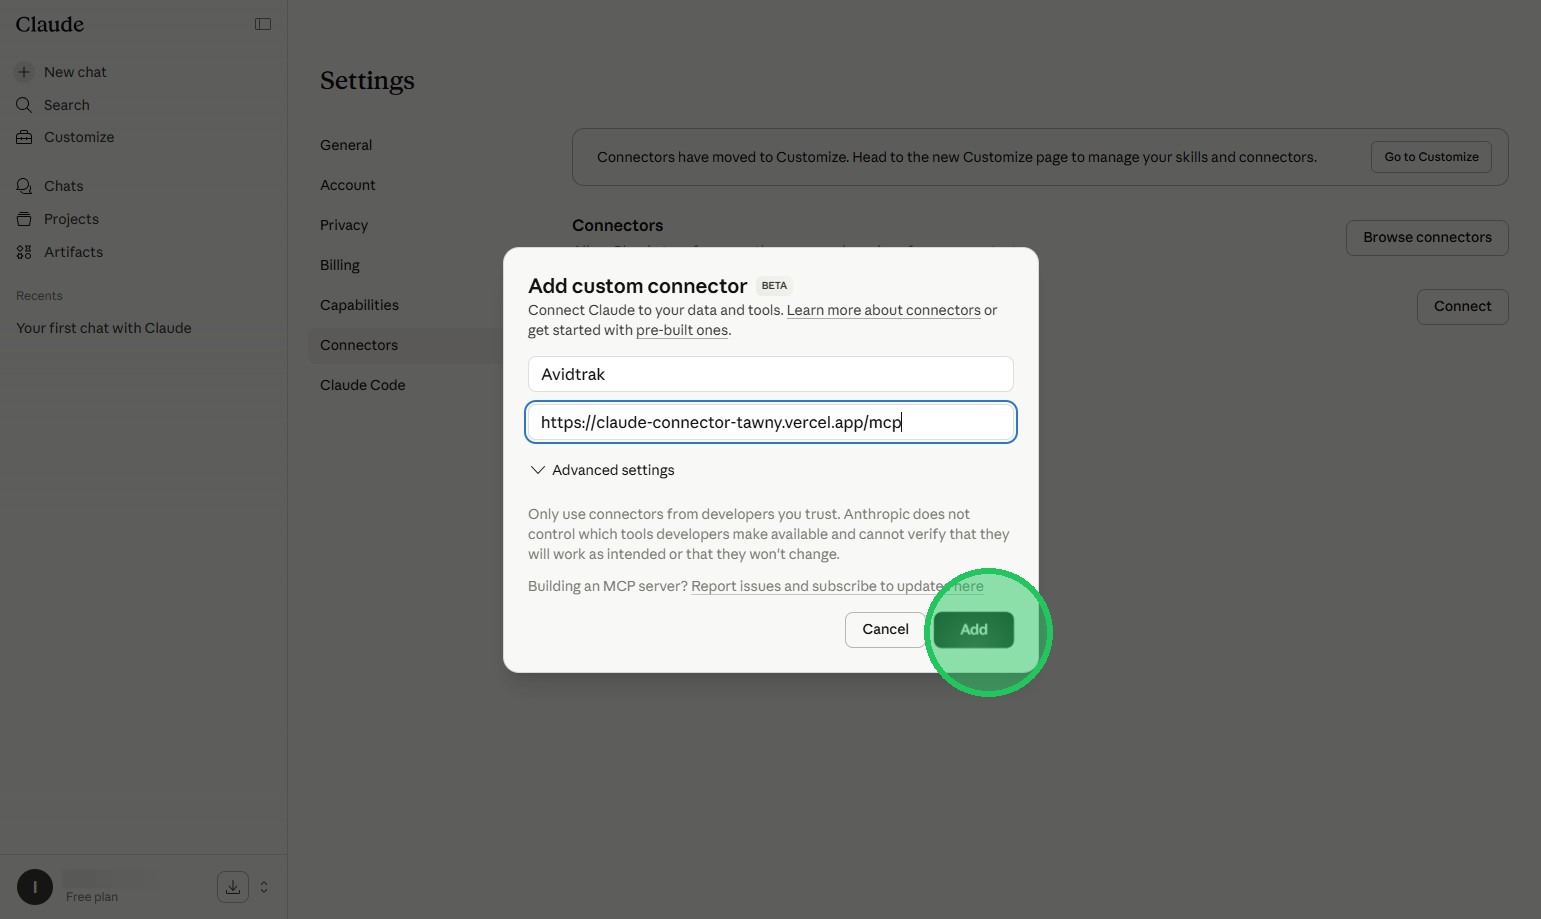
9. Click the “Add” button and enter https://claude-connector-tawny.vercel.app/mcp in the MCP field.
10. Next, Click “Configure” button
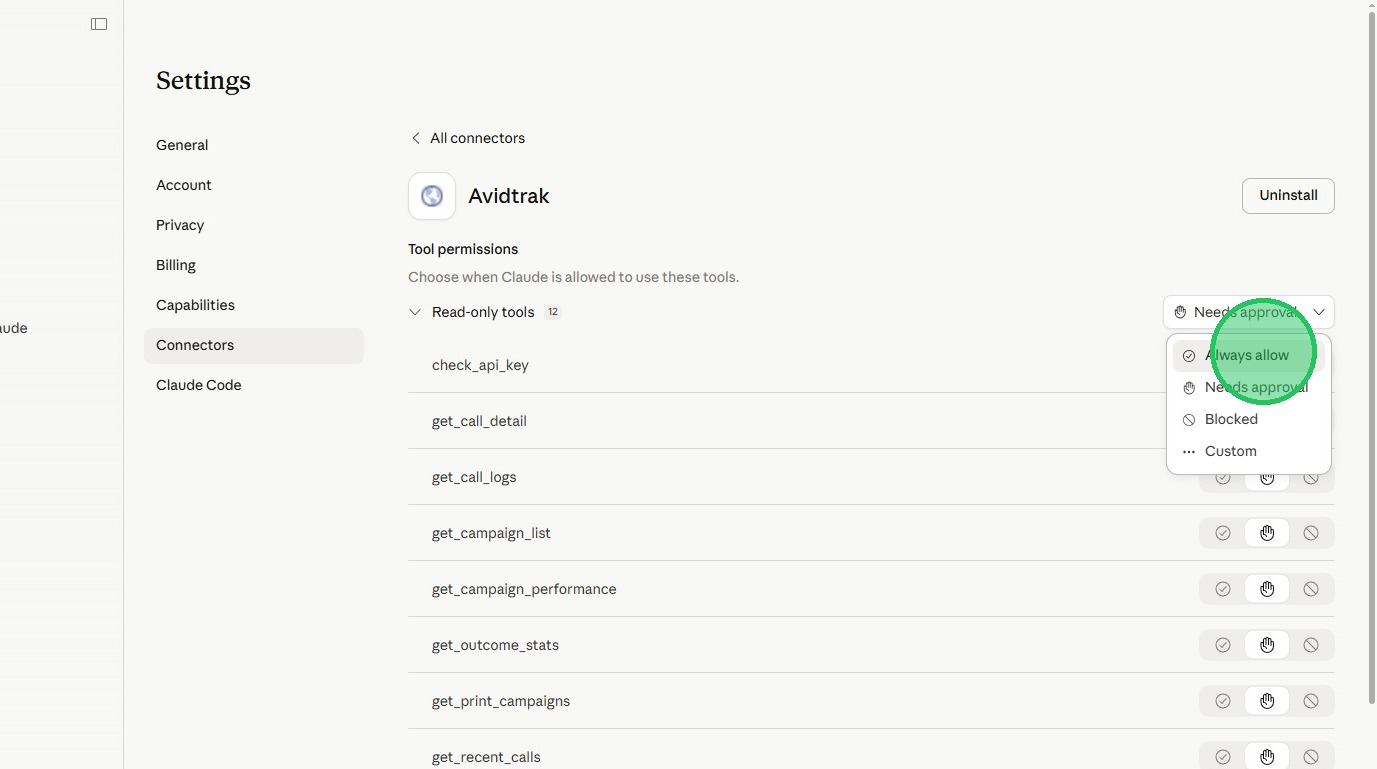
11. Next, Click the “Needs Approval” field

12. Next, Click the “Always allow” field to allow all the available data in your AvidTrak account to be available to your Claude account.
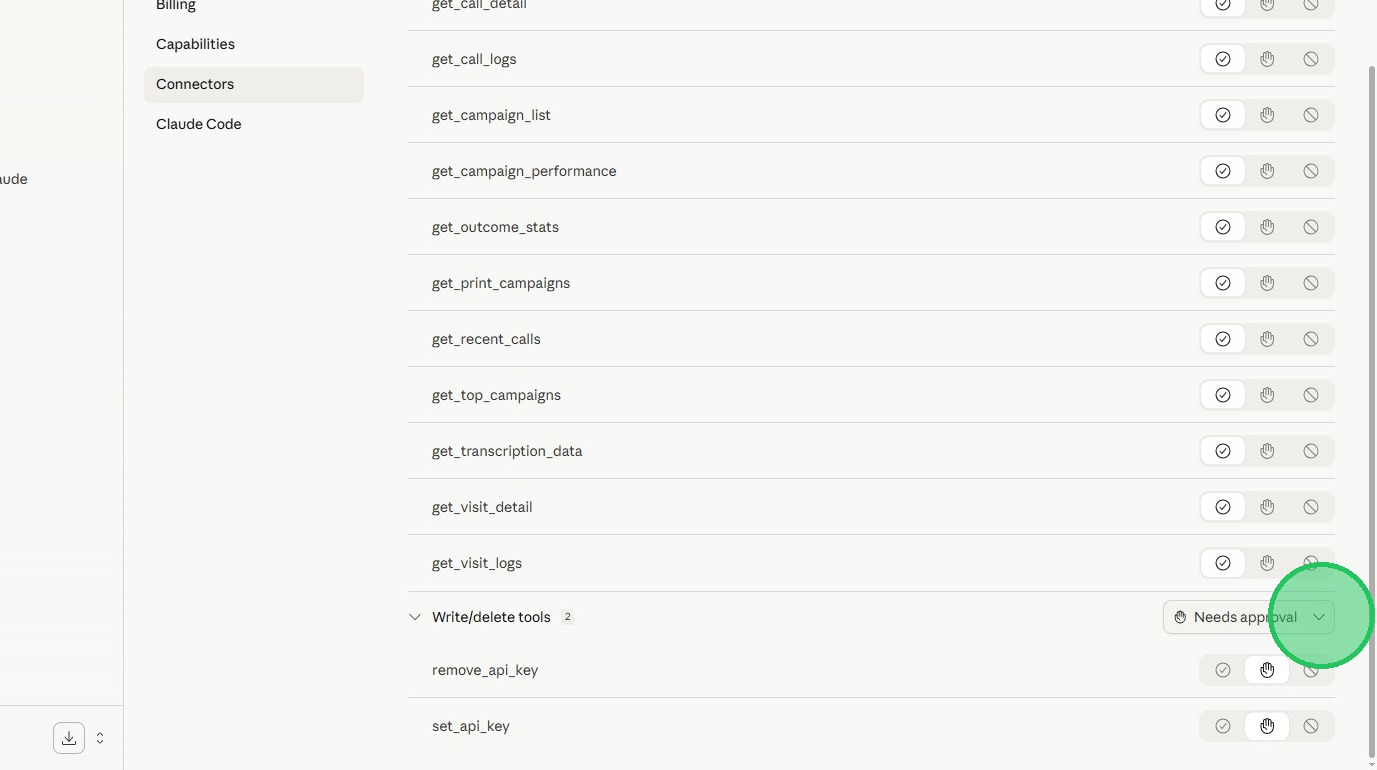
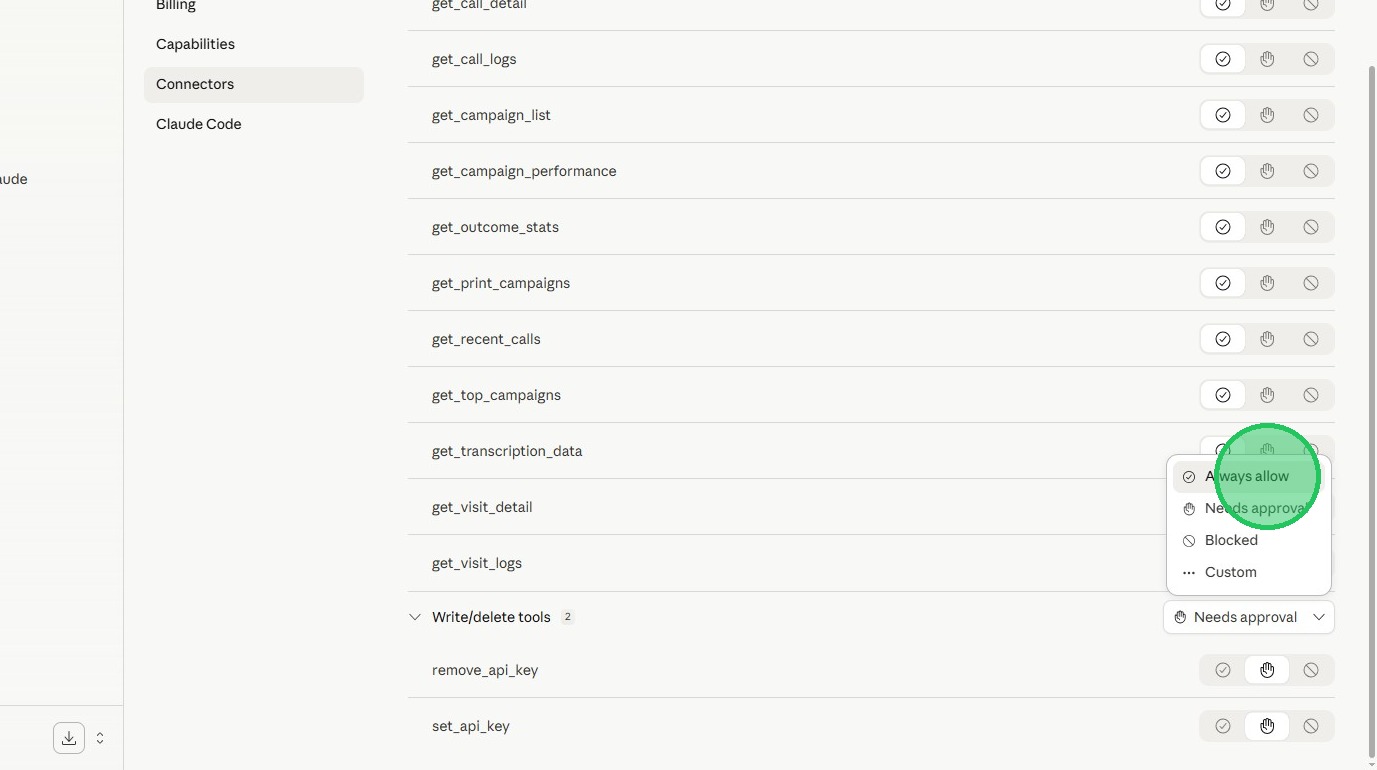
13. Next, Select Write/delete tools Click the “Needs Approval” field
14. Next, Click the “Always allow” to allow all the available AvidTrak data in your account to be accessible to Claude.
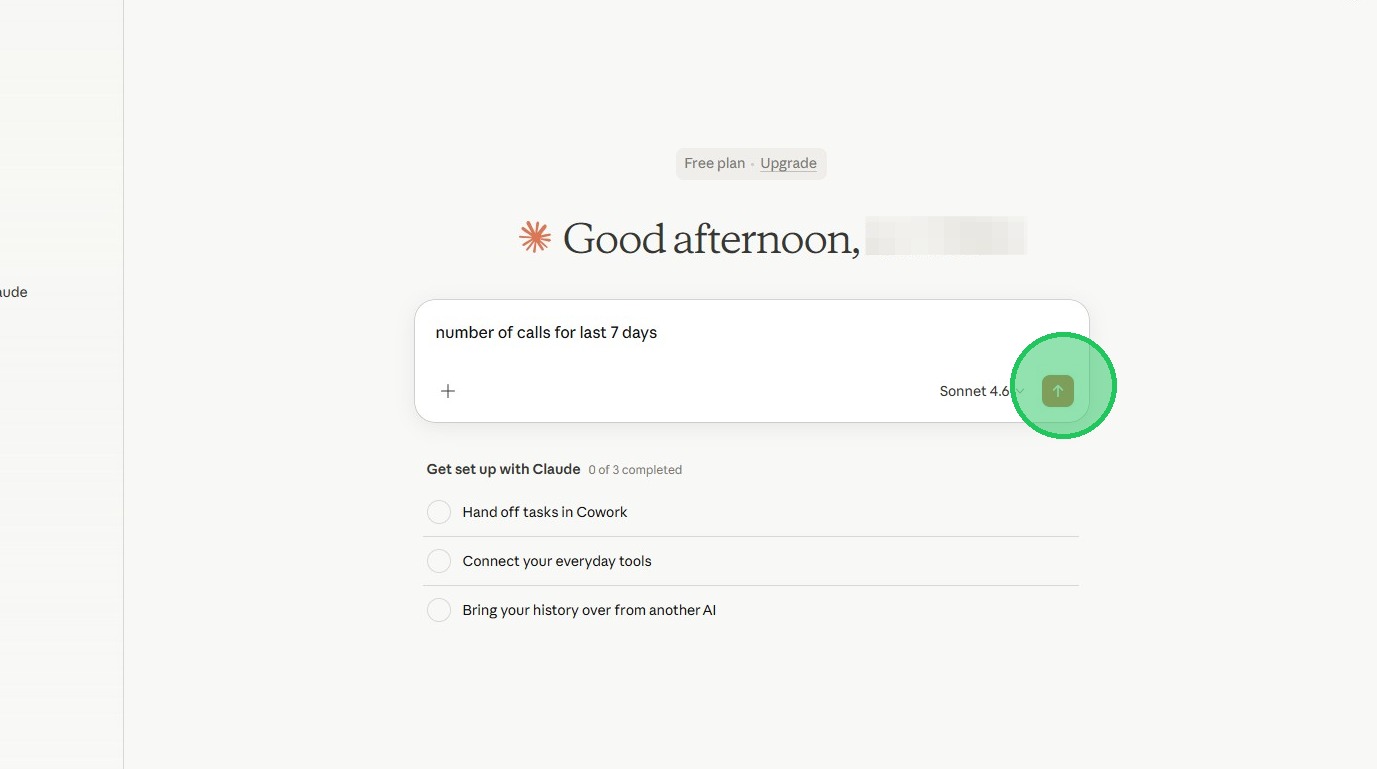
15. Next Click the “New chat” Link
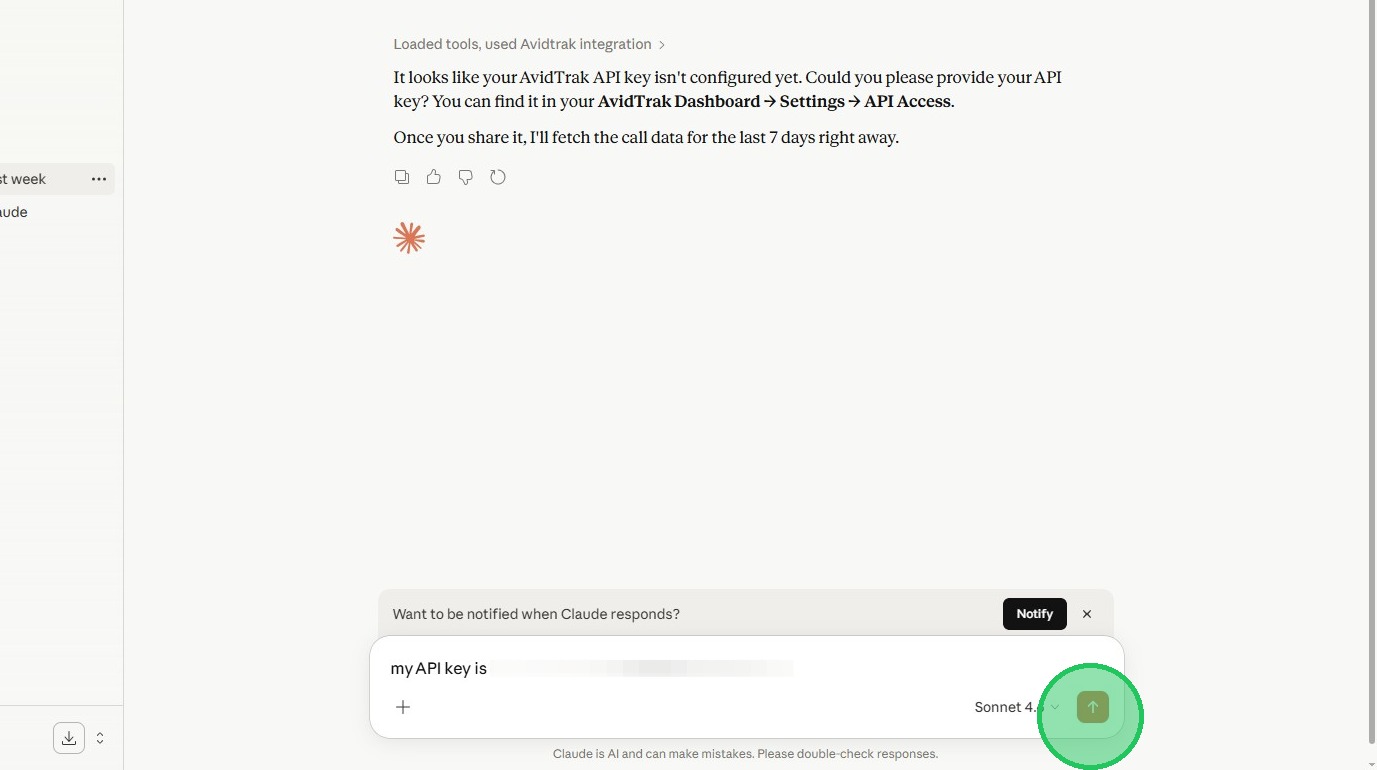
16. Next, Type in the field (e.g., “Number of calls for last 7 days”), then click the amber button. If this is the first time that you are connecting Claude to your AvidTrak account, Claude will respond with a request for you to provide your AvidTrak account’s API key. To access your AvidTrak account’s API key move on to the next step. If you already have the API key then simply copy and paste the key in Claude’s response field.
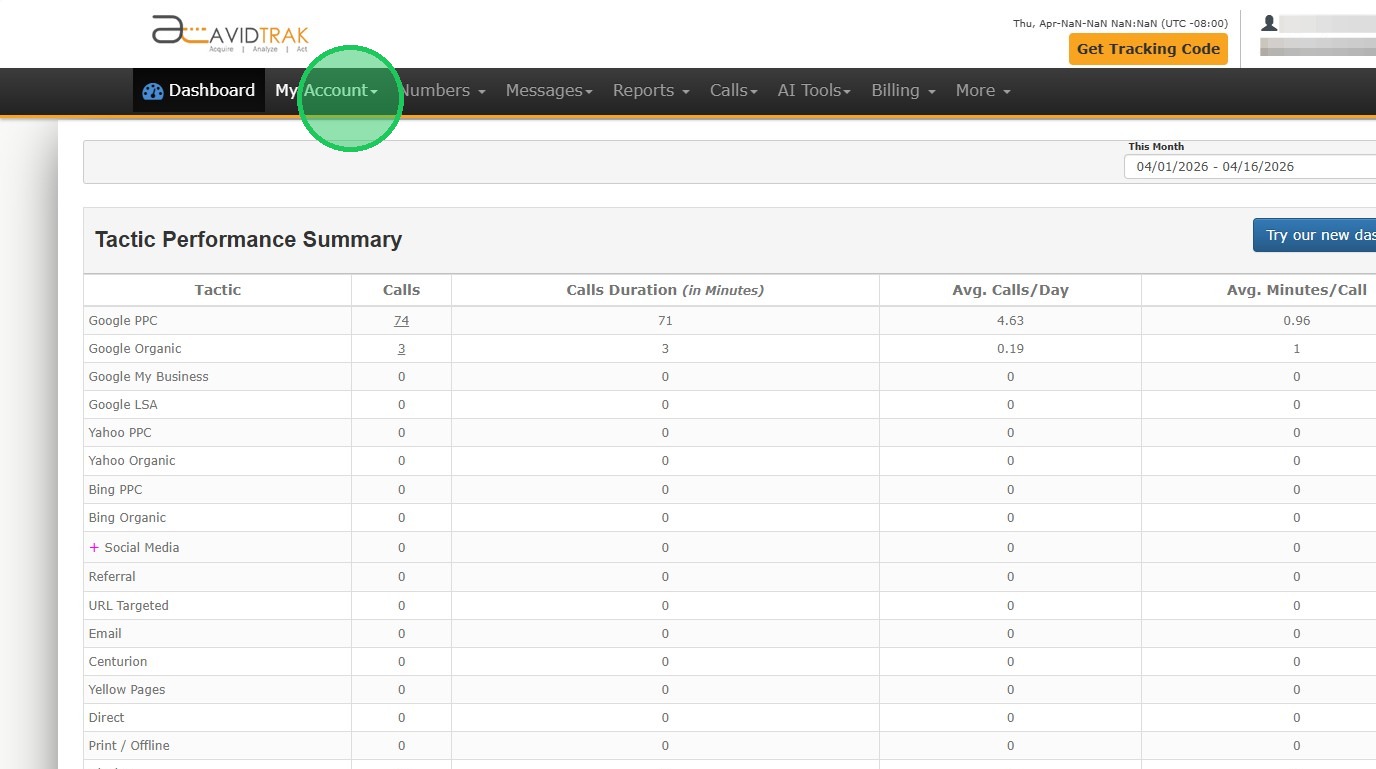
17. In this section you will learn how to access your AvidTrak account’s API key. After logging into your AvidTrak account, navigate to the top menu bar and find the My Account link.
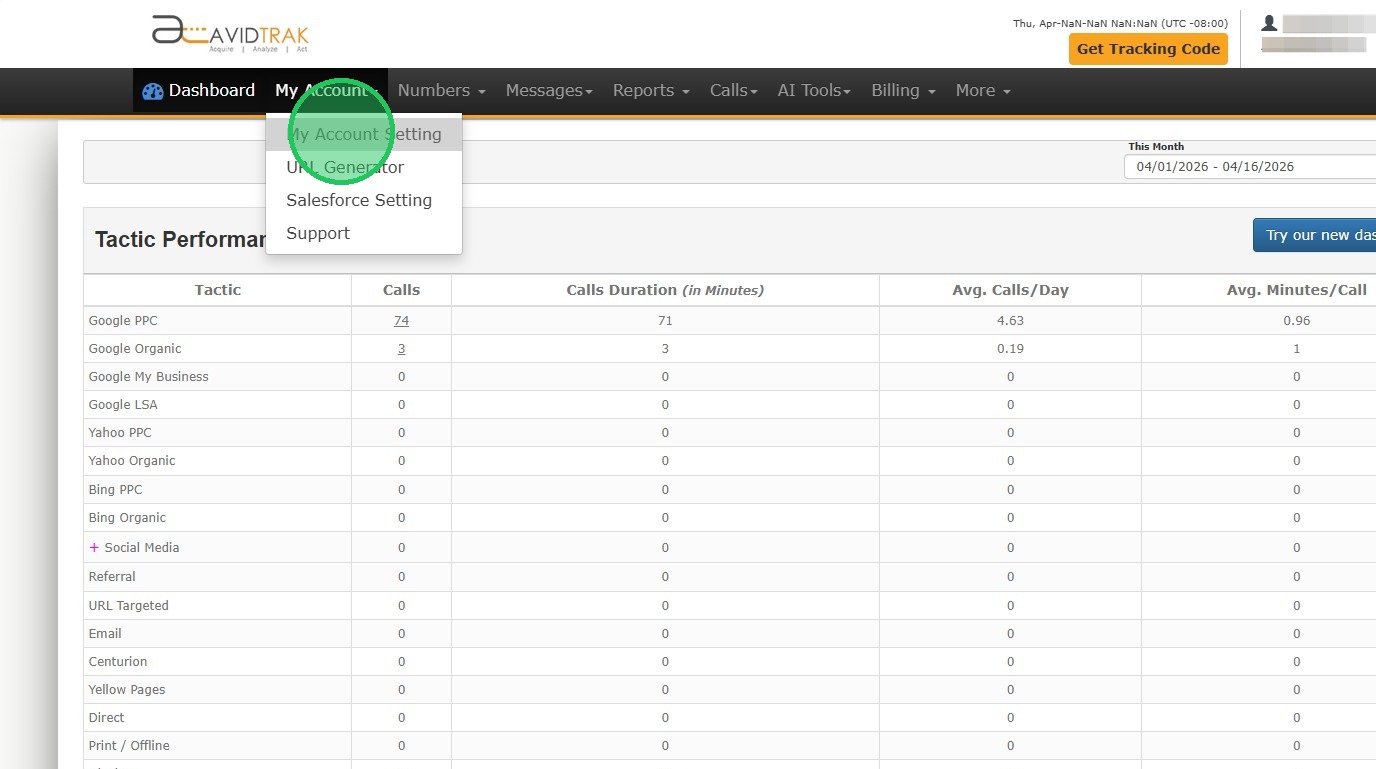
18. Next, Click the “My Account Setting”
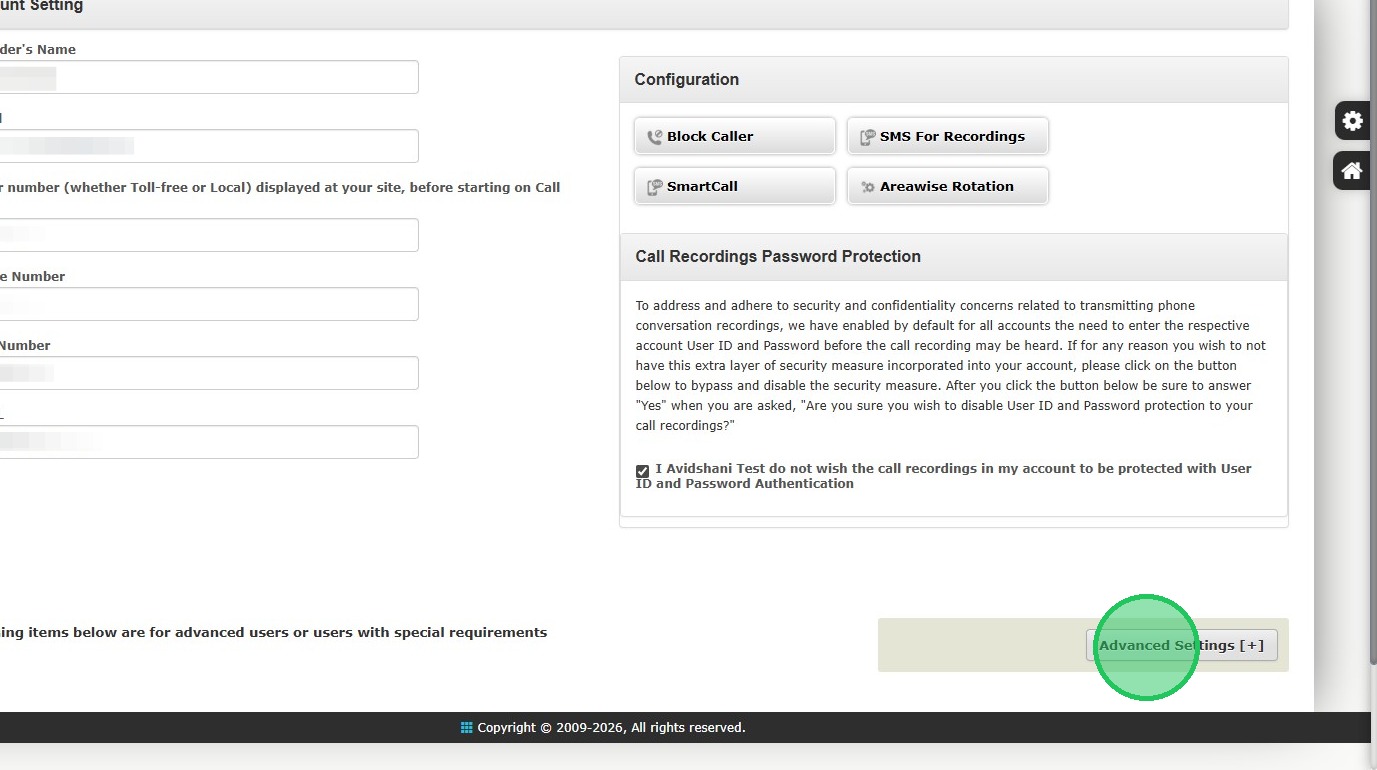
19. Next, Click the “Advanced Settings” button.
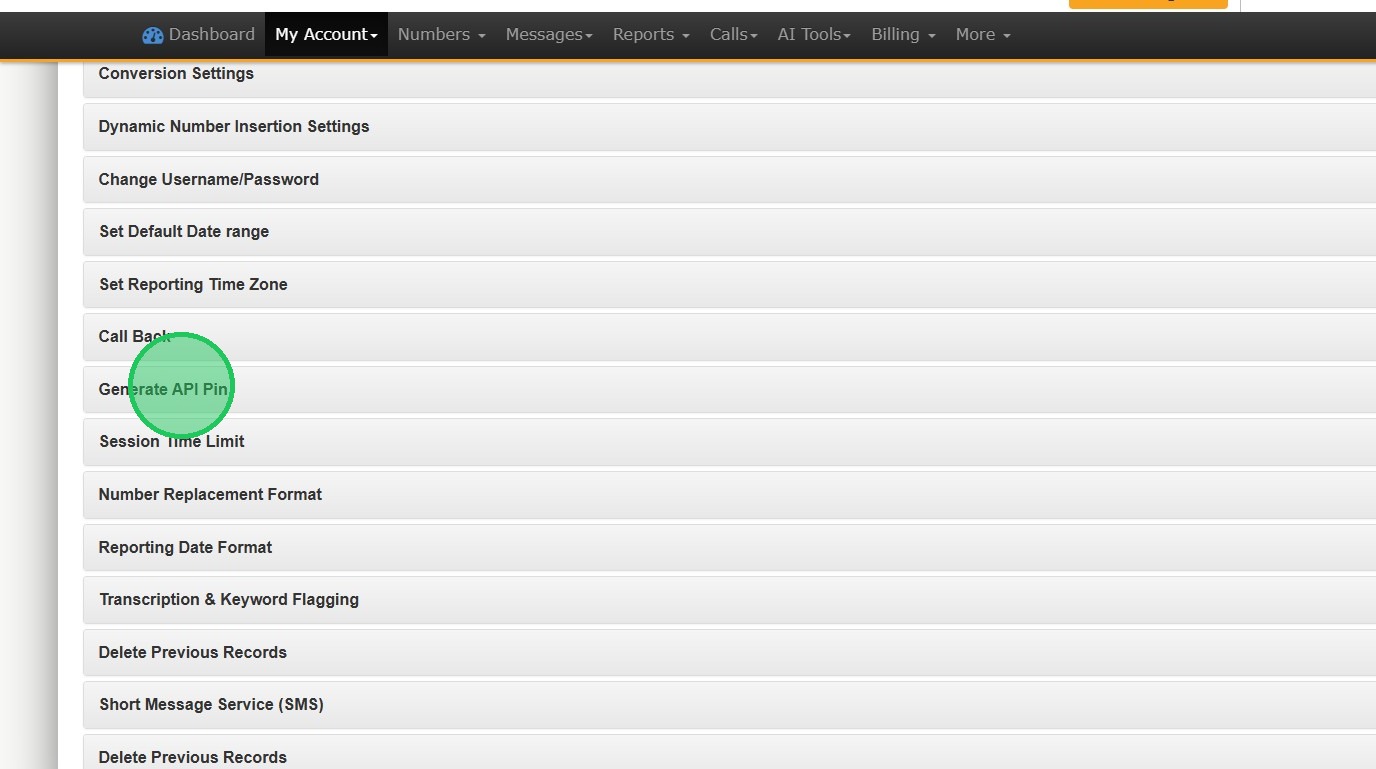
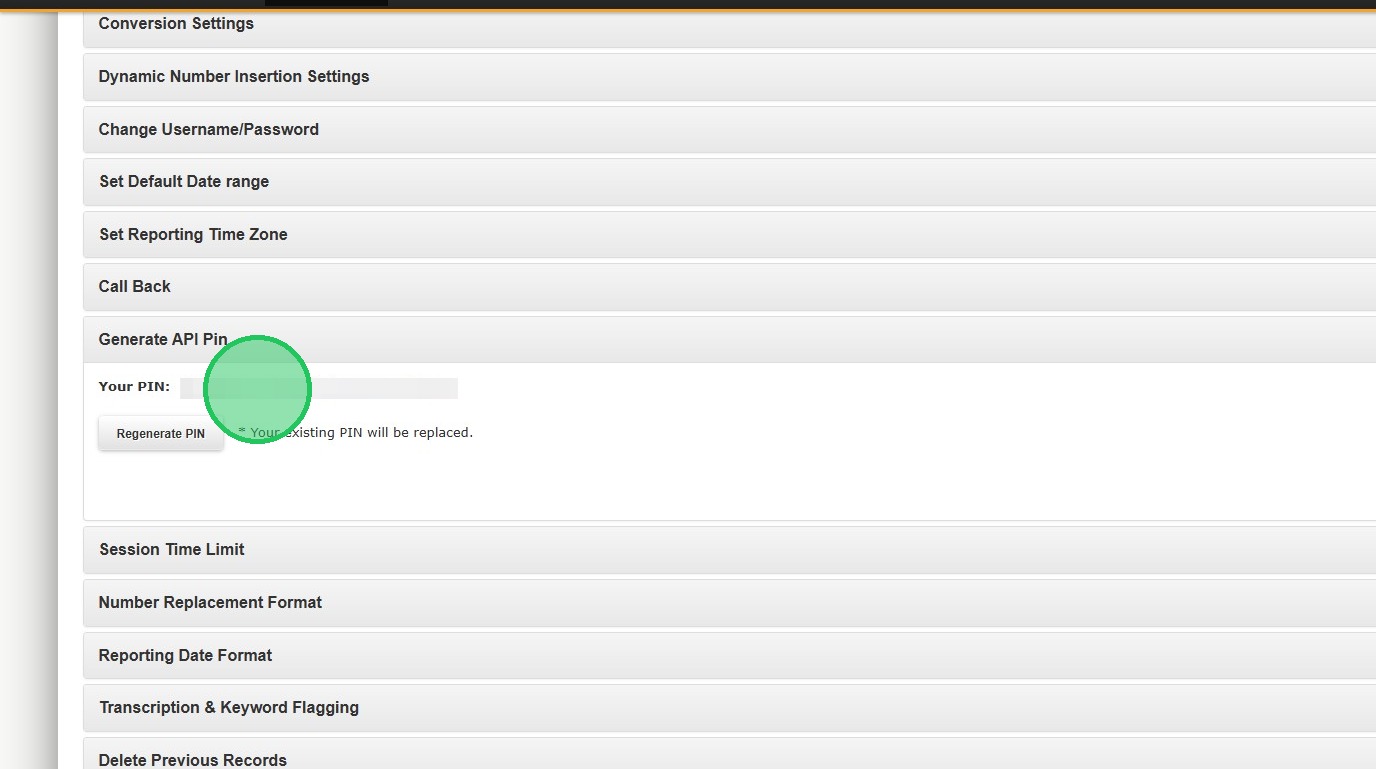
20. Next, Click the “Generate API Pin” if you do not already have an API Pin. If you already have an API pin generated, then do not generate another pin.
21. Next, copy the API pin.
22. Go back to the browser window in Claude and paste the API Key into its respective field.
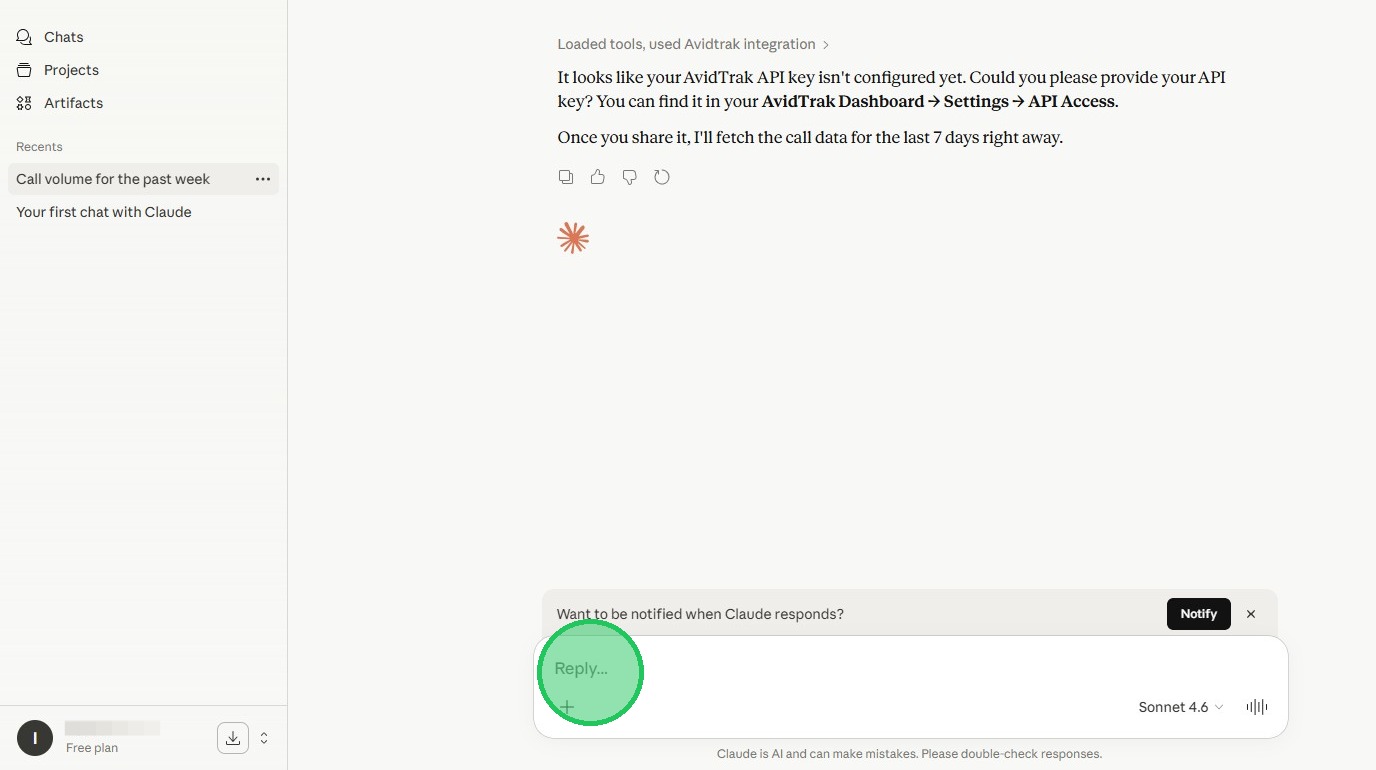
23. After entering the API key click enter or the send (up arrow) button.
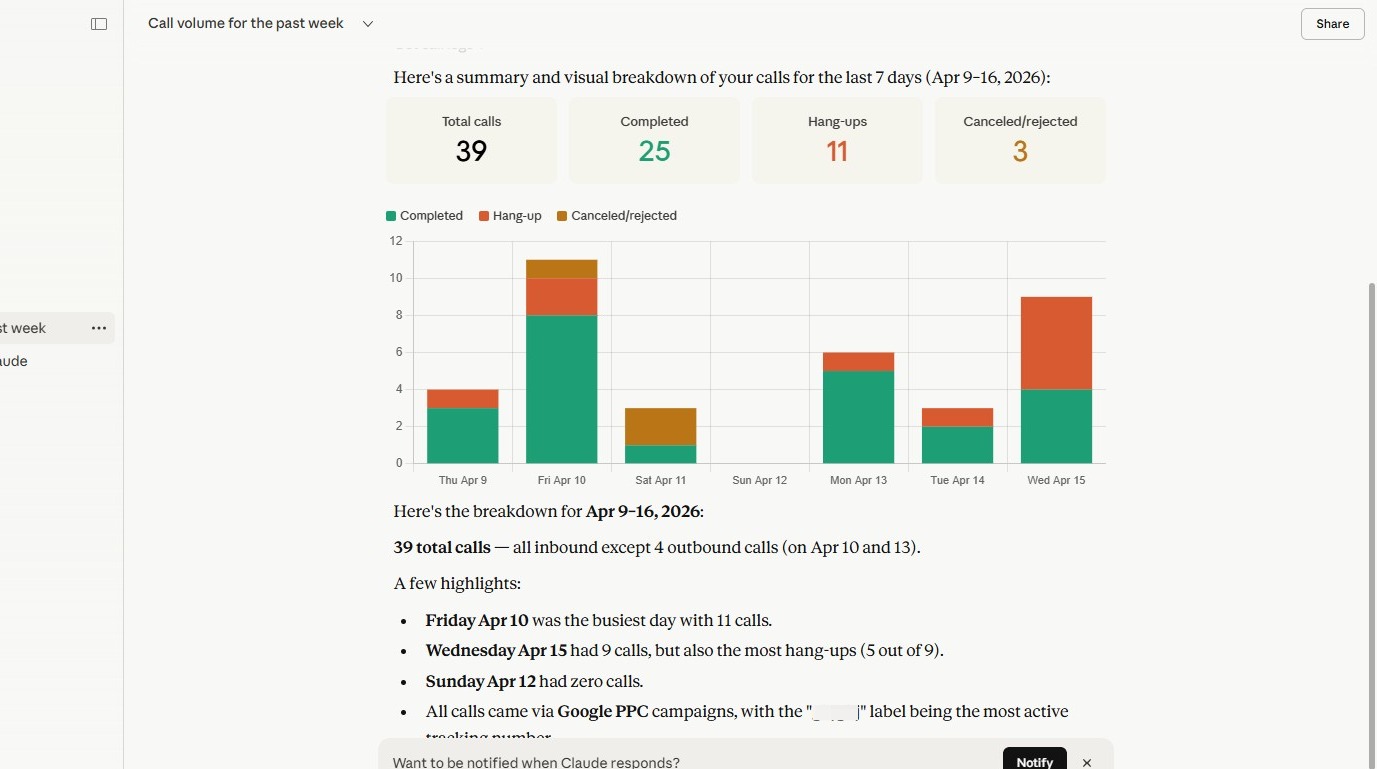
24. Once you have successfully connected Claude with AvidTrak you may begin tasking Claude with performing deep data dives. Claude will fetch and analyze the data as commanded by you.
25. This completes the tutorial on How to Integrate and connect your AvidTrak account with Claude AI. If you have questions or need any kind of additional assistance please do not hesitate to contact our support team by emailing support@avidtrak.com