How to Add Print Call Tracking Numbers in your Existing AvidTrak Account
Change the Receiving Number of your Call Tracking Number, Set Whisper and Enable Call Recording
Login to your AvidTrak account with your User ID and Password
Acquiring and Setting up/Configuring Print Call Tracking Number for your Account
After you have successfully signed into your AvidTrak account you may purchase a print number for your account. Select the menu item ‘Numbers’ and click ‘Add numbers’
Select either Local or Toll Free. In the field marked Area Code enter the desired area code.
Next, from the pull down menu choose a country. In the example below we have chosen United States as the country for which we need a call tracking number.
Click the Search button.
Select a number or multiple numbers (depending on the available credit balance in your account). To select apply a check to the checkbox next to the number. Click the Order button.
Click the OK button to approve the Purchase.
You now need to configure this newly purchased number so that you may use it. To configure select menu item ‘Numbers’ and click ‘Manage Numbers’.
In the new screen that opens, search for the number that you just ordered and is listed in your account
Changing Receiving Number on your Print Call Tracking Number
First of all, for the column name “Receiving Number” input a number. A receiving number is the number that receives calls from your call tracking number. It may be either your office, home or mobile number. In the field marked Label Name input a name. Click the save button to save your phone number settings.
Note: We do recommend that after changing the receiving number you test your changes by dialing your AvidTrak number to ensure that your savings were saved successfully.
Receiving Number: You must input a number of the same country as that of your ordered tracking number
After you have successfully saved your configuration setting your number and its labels will appear.
Assigning “PRINT” Channel to the Call Tracking Number
Click the edit link under the column “Assign Channel”
In the new screen that opens up, select the first checkbox which says ‘Print (offline)’ then select device type. In the field Label Name (optional) you may enter a nickname for this phone number. The Tactics Label (optional) is a second name that you can enter to distinguish your number. In the field labeled Receiving enter all 10 digits of the receiving number.
Click OK when the Onscreen prompt says Settings Saved.
Now you will see that your ordered phone number is set to ‘Print’ channel and will receive calls on the receiving number you provided
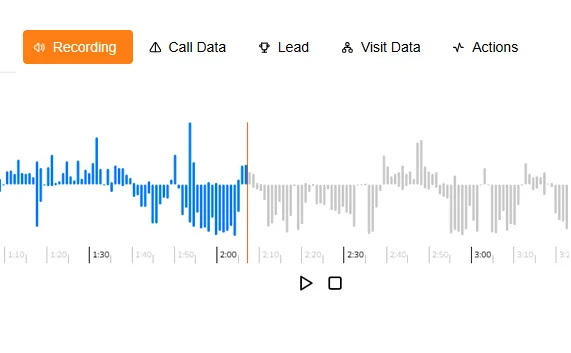
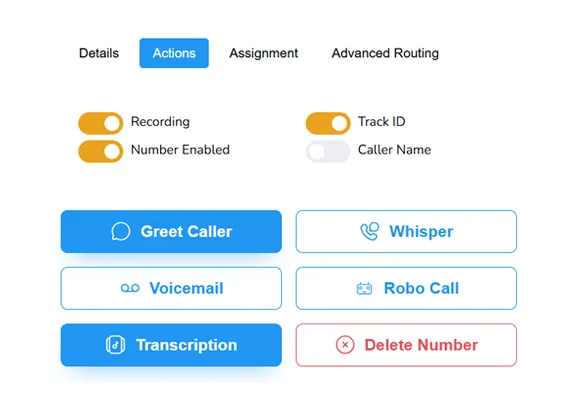
Turning “Call Recording” on
Now you will see that your ordered phone number is set to ‘Print’ channel and will receive calls on the receiving number you provided
Adding Announcement “Preamble” for Call Recording.
If you have call recording enabled and you wish to use a preamble announcement to inform your callers that call recording is enabled, then click the Greetings icon next to the recording icon as shown in the image below
In the Preamble field type in your announcement: In the example below we have entered “this call will be recorded for quality assurance” Click update to save your work and wait for the Onscreen prompt advising you that your settings were saved.
Or you can also upload an mp3 file according to your company requirements
Adding Whisper Messages
A whisper message is an announcement that the person receiving the phone call hears just before the caller’s voice is transmitted to the receiver. Whisper messages are used by Marketers as a means to identify the source of the call. For example if you are running a Classified Ad and using a call tracking number and wish to identify the source of the call you can enter a whisper. To add a whisper to your call tracking number click Setting under the column Whisper Settings
Enter your whisper message and then click Update. We recommend that you keep your Whisper Message as short as possible.
Or you can also upload an mp3 file according to your company requirements
Enabling Email Notifications
AvidTrak allows you to receive email notifications after a call has been received. The email advice carries: Date and Time of Call, Caller ID of caller, Call Duration and a link to the Call Recording which you may listen to by clicking. To setup email advice of call recordings click the message icon next to the whisper symbol as shown in the figure below
In the dialog box that opens up enter the email addresses that you wish to send the email advice. To send an email advice to more than one person in the second field enter the email addresses for other recipients. Separate the email addresses with a comma but do not use a space after a comma. For example:
,
is the correct way to enter an email address. The incorrect way would be:
,
. You may also apply a filter to the email reports that you wish to use. For example if you only wish to receive email alerts for those calls that last more than 1 minute, from the Call Duration Filter pull down menu select Greater Than and input the digit 1 in the minutes field. Apply a check to the Enable Email Alerts box and click the Update button to save your settings.
If your settings are saved successfully, AvidTrak will issue you an Onscreen prompt.
Adding Funds to your Free Trial Print Call Tracking Number Account
To fund your AvidTrak Lite account, select the menu item ‘Billing’ and click make payment
AvidTrak is a prepaid service and to ensure uninterrupted service of your call tracking account you must maintain a positive balance within your account. Please note that failure to maintain a positive balance in your account could result in your account being shut down without additional notification being sent to you. Hence we recommend that you setup Auto Recharge i.e. recurring payment. Auto Recharge Payments will be processed through Authorize.Net.
If for any particular reason you do not wish to fund your account by way of Auto Recharge you may make a 1-time payment by way of PayPal. Please note that in order to make a 1-time payment, you may use your credit card.
You can also make payments by using a PayPal account
Reviewing Calls and Call Logs in your Print Call Tracking Number Account
Once your campaigns are activated and you wish to view reports on incoming calls simply select the menu item ‘More’ and select All Print Calls to view call logs of your incoming calls. You may adjust the date range to view the calls logs in your date range.
Blocking Unwanted SPAM Callers from Dialing your Print Call Tracking Number
If you find that you have become a target of SPAM calls from telemarketing agencies or from Robo-Callers then you may elect to Block certain numbers from dialing your call tracking number. To access the call blocking feature select the menu item ‘More’ and click Block Numbers under the Print heading, as shown below.
Enter the phone number that you wish to block. Enter the number that is to be blocked without use of dashes, parenthesis, spaces or dots. Click the Block button to save the setting for the blocked phone number. If you wish to also advise the blocked callers to place your name on the do not call list then you can type in a message which will be played to the Block Caller. In the example below we have typed in “Please remove us from your list.”
After saving your settings you will see the phone number(s) that have been placed on the blocked callers list as well as any message that you wish blocked callers to hear when dialing your call tracking number. Note: We do recommend very strongly that after implementing this feature you test it by first dialing the AvidTrak number with your own non-blocked number. Your unblocked number should get through and the call should complete correctly. After the preceding test we recommend that you use another number that you may place on the blocked number list and then dial the AvidTrak number from your test blocked number. Your blocked number should not be able to complete the call and you should hear your blocked call message. You may always remove a block from a particular number by selecting the number and then clicking Remove Blocking.
Deleting Print Call Tracking Numbers
If you do not need to use a particular AvidTrak number and do not wish to incur additional charges such as monthly rental or talk time costs then you may delete the number. To delete a number click the red trash icon in the right most settings column against the number. Please note that all deletions are final and hence please be certain that you wish to delete a number before executing this function.
On successfully deleting a number, AvidTrak will advise you that your call tracking number has been deleted.
An on screen prompt will ask you to confirm if you are certain to delete this number.