
How to Setup a Free AvidTrak Trial Account
1. Click “Try for Free”

2. Click the “Name / Company” field and enter your name or your company name.

3. Click the “Email” field and enter your email address.

4. Click the “Phone Number” field and enter a US or Canadian telephone number from a US or Canadian carrier. No burner phone numbers allowed.

5. Check the I’m not a Robot field

6. Click “Submit”

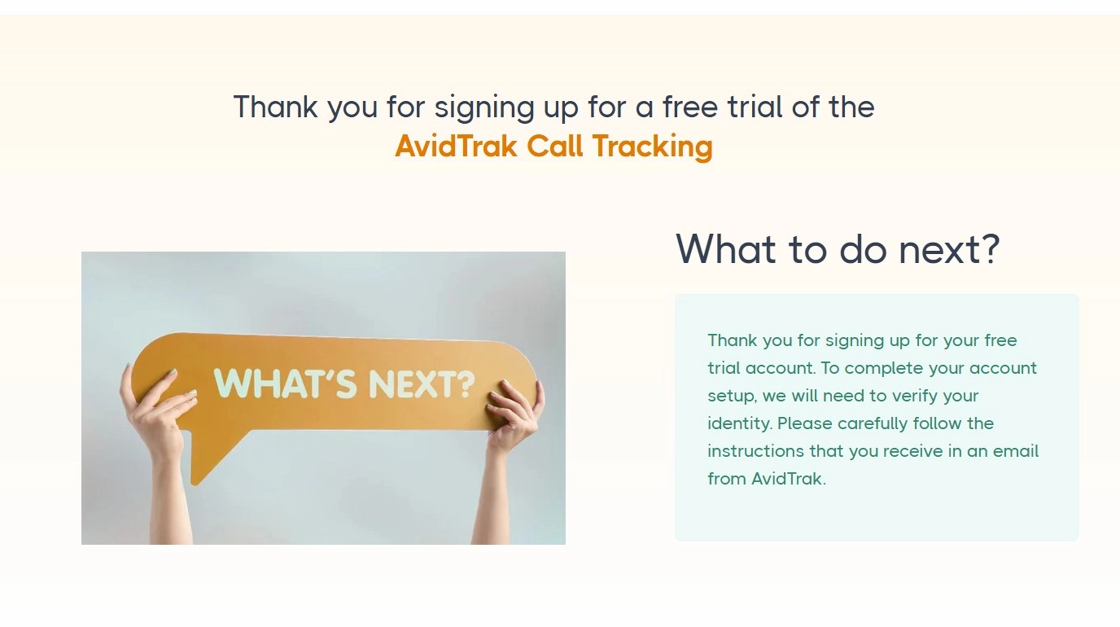
7. Wait for the Thank you page to load. After the page has loaded, please check your email inbox for further instructions from AvidTrak.
8. In your email inbox, look for an email from AvidTrak with the subject “AvidTrak Email Verification.” Open the email received from AvidTrak.

9. Click the “Call Me” button found in the email that you received from AvidTrak and wait for a phone call from AvidTrak’s verification system.
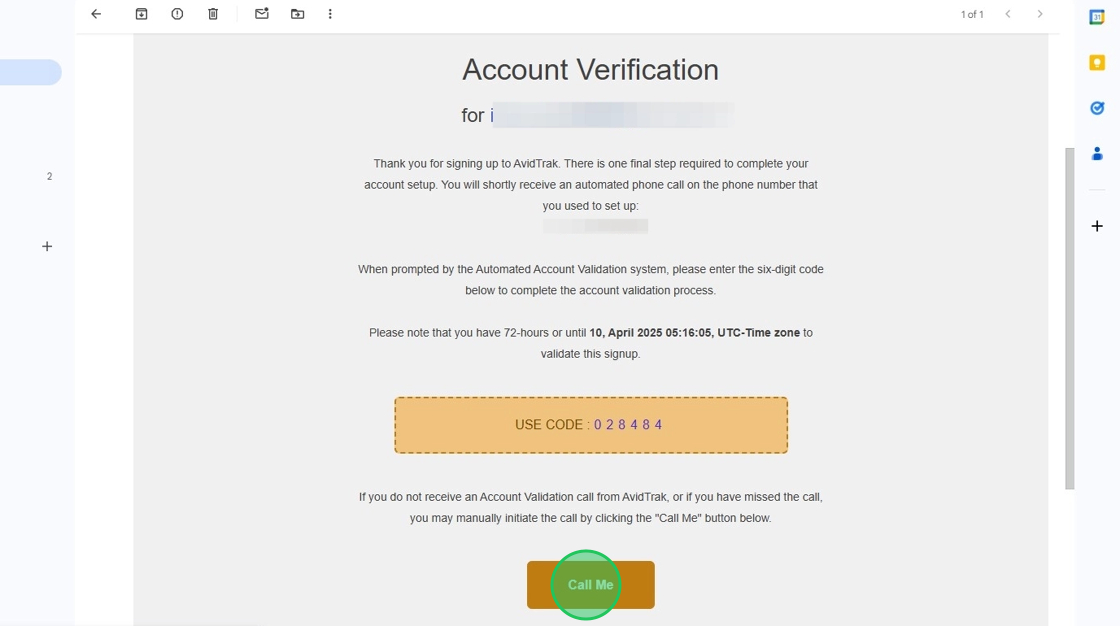
10. When you receive the call from AvidTrak, please enter the six digits that you have received in the email. If you enter the six digits correctly, you will receive an acknowledgement from AvidTrak confirming that your account is now setup.

11. Check your email again and open the email with Subject headline “Your Account Setup has been Successfully Completed.”

12. Click the “Login” button.

13. Enter your email or Username and temporary password in the fields and click the Signin button.

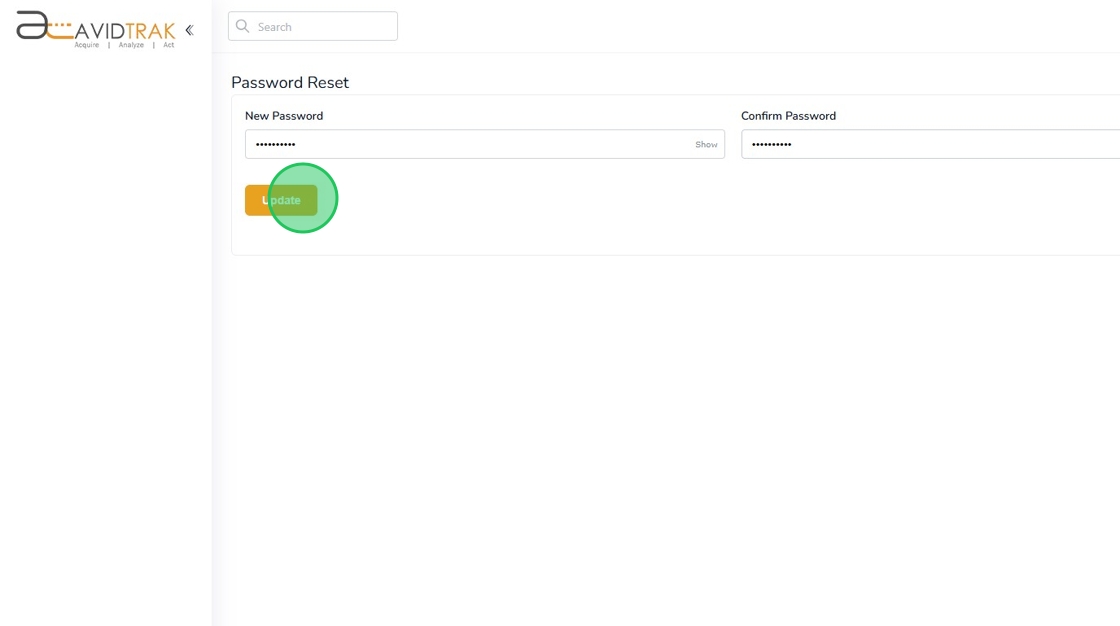
14. Click the “New Password” field and enter a new password. Your new password must be at least eight characters in length and have at least: one upper case letter, one lower case letter, one numeric digit and one special character.

15. Reenter your new password in the “Confirm Password” field.

16. Click the “Update” button to save your new password. Be sure to save your password in a safe place and do not share your password with any third party.
17. Click the “Proceed” button to initiate the smart setup of your account.

18. Enter a US or Canadian three digit area code in the “Area Code *” field.

19. Click “Next” to allow our platform to proceed with a search for telephone numbers that match your area code. Select one number that you like and click Next.

20. Click “OK” to reconfirm your selection.

21. In the Receiving Number field enter the US or Canadian telephone number where you wish to receive calls from the tracking number. Optionally, in the website number field enter the phone number that currently appears on your website. Click Next to advance to the next step.

22. Assign a marketing channel to the tracking phone number that you recently selected. In this example we have selected “Google PPC” as the marketing channel assigned to the tracking phone number.

23. If you would like to turn on call recording and caller name slide the rocker switch to the right. Sliding and enabling the Track ID will render the tracking phone number digits to the call recipient. If you would like the caller’s phone number to appear to the call recipient do not turn enable Track ID.
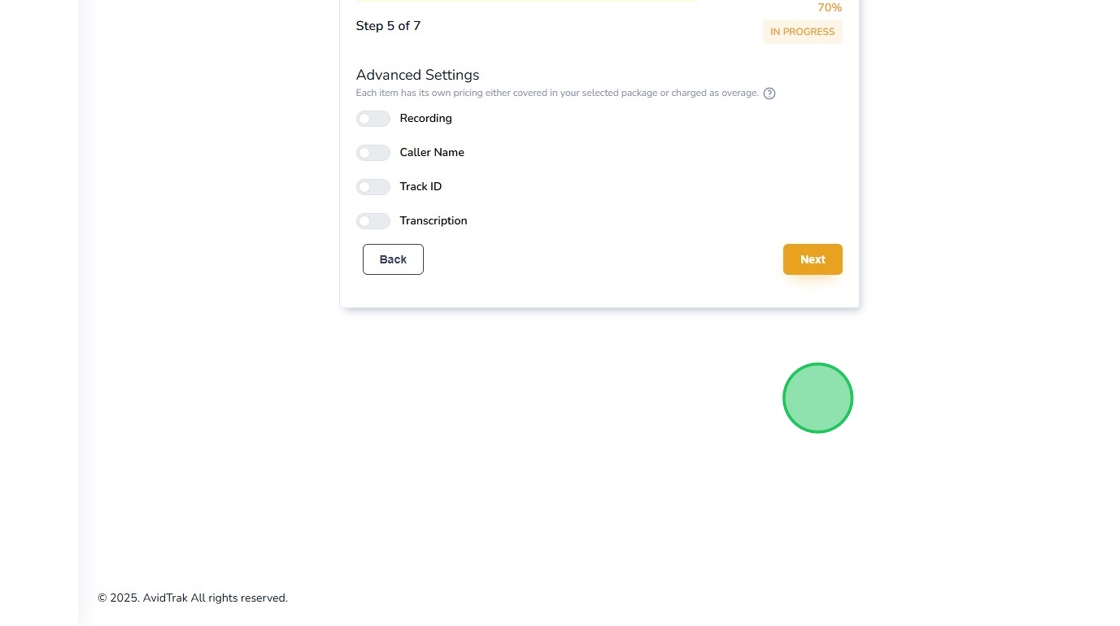
24. Click “Next” to save your settings.

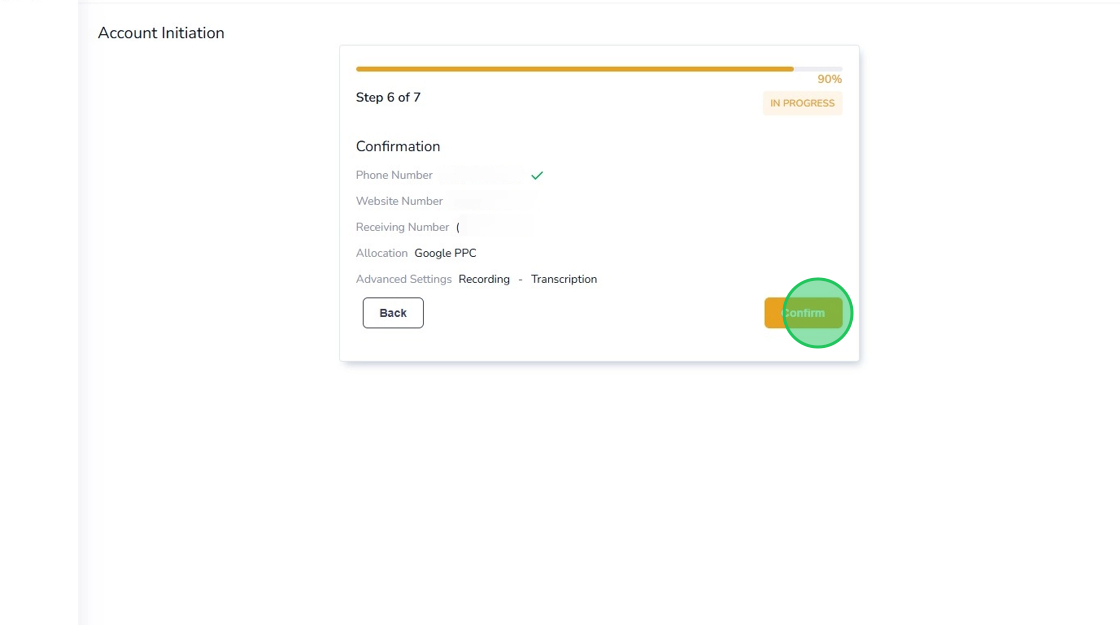
25. Click “Confirm” to reconfirm your selection.
26. Click “OK” to double confirm all your settings.

27. Congratulations! Your setup is completed. Click “Dashboard” to start using your AvidTrak account.

28. This concludes the setup instructions.
